How to edit a video like a pro:
what one real film did.
Pros don't know more buttons. They make the same few decisions, every time. Here they are, taken apart in one real 9-minute film.
 Ben, founder of Montage · · 8 min read
In this post8 parts
The short answer.
Ladies and gentlemen, let's start with the answer.
How to edit a video like a pro? You don't need a better program. You need five habits. Cut hard. Keep one look across every take. Build the parts that come back once, and reuse them. Put the proof on screen while you talk. And when someone else is in the story, give them their own frame.
That's it. Those five are what make a video look like the channels you watch. None of them is a button.
So in this one, I'll take one real film apart, habit by habit, and show you where each one is. If you're just starting out with video editing, read the beginner's guide first: this article is the step after it.
What « like a pro » really means.
So what makes an edit look pro? Let me explain.
Most of the pages that answer this question say the same thing: learn your software better. Its shortcuts. Its effects. Its workflow. And sure, that helps you edit faster.
But here's the thing: speed isn't what your viewer sees. Your viewer sees decisions. What stayed in. What got cut. Whether the color jumps between two shots. Whether your face cam looks the same in minute one and minute nine. Whether, when you mention a headline, the headline is there.
Pros don't know more buttons. They make the same decisions every time.
That's the difference. An amateur edit makes each decision once, by feel. A pro edit makes it the same way across the whole video.
How to edit a video like a pro, habit by habit.
Let me show you with a real film: From Disney star to space CEO. A long-form YouTube video, 16:9, about a founder's story. It started as seven takes, 33 minutes filmed on an iPhone. The finished film runs 9 minutes and 18 seconds.
Here's what made it look pro.
1. Cut hard
33 minutes of takes became 9:18. That's 216 cuts, with the best take of each line kept.
Why does that look professional? Because nobody watching knows there were seven takes. They only see the good one. Jump cuts are normal here: YouTube's own help page says they're there « to cover up unwanted lines or filler words » (YouTube Help).
And the same page gives you a way to check your cut after you post: your audience retention graph. « Dips can mean that viewers skip those parts or leave your video. » If people skip it, cut it next time.
If you're bored watching a moment, so is everyone else.
2. One look across every take
This is the one most beginners miss.
In this film, takes 4 to 7 were filmed flat, and the first three weren't. Put them side by side and the picture would change every time the take changes. So the NOMAD LUT went on takes 4 to 7, and the first three were left as they were. Now the color no longer jumps when the take changes.
 Color correctionTakes 4 to 7 were filmed flat: the NOMAD LUT on each, the first three left as they were. Same frame, split.
 Color correctionFilmed flat in HDR, the NOMAD LUT on every shot. Same frame, split.
Same idea on a 38-second ad, Edit it all with AI: filmed flat in HDR, the NOMAD LUT on every shot. And in How to be creative, filmed in Apple Log, my LUT went on every shot too.
A pro doesn't make one shot beautiful. A pro makes them all match. Here's how to match the color across your takes.
3. Build it once, reuse it
Now, this is what makes a channel look like a show instead of a pile of clips.
In this film, my face cam is a component: a macOS window over the James Webb images, on every one of the 216 cuts. One media card, a picture or a clip with its caption on the dark page, is used 26 times. And the sponsor got a component of its own: frosted glass, the QR code and the code BLG.
 ComponentsMy face cam is a component: a macOS window over the James Webb images, on every one of the 216 cuts. Click to watch it.
 Reusable componentsOne media card, used 26 times: a picture or a clip, its caption, on the dark page. Click to watch it.
 Sponsor cardA component made for the sponsor: frosted glass, the QR code and the code BLG. Click to watch it.
Why does that matter? Because the 26th media card looks exactly like the first. Nothing drifts. The viewer learns your visual language in the first minute, and then it just works.
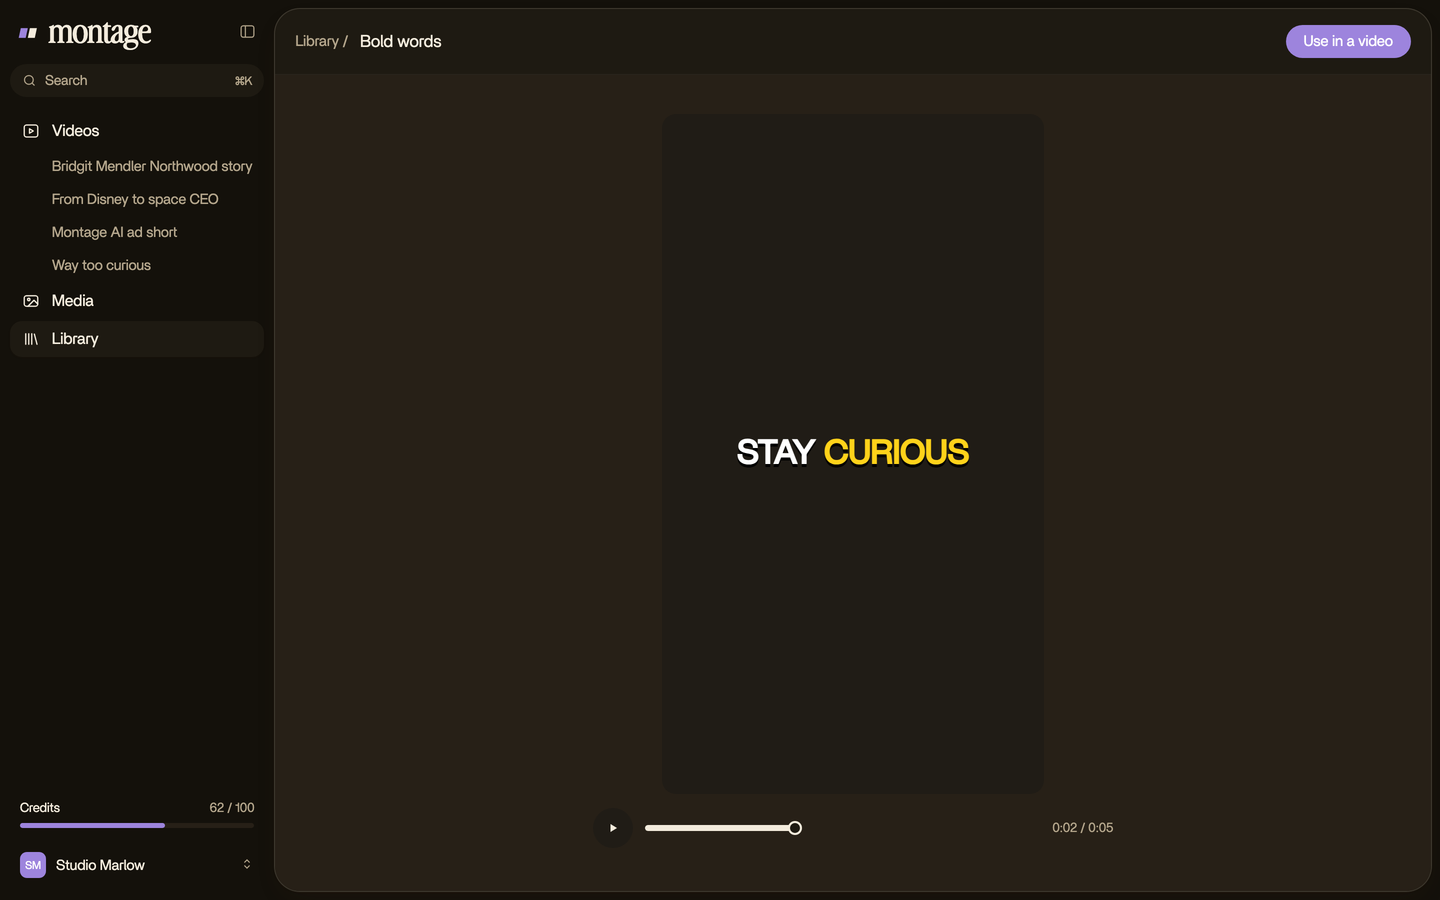
If you make the same kind of video every week, set these parts up once. More on reusable templates for your videos.
Build it once. Use it 26 times.
4. Put the proof on screen
When you talk about something, show it. Every time.
In this film, when I mention Good Luck Charlie, Ready or Not, Billboard or the TODAY antenna, the clip plays and the face cam moves to the corner. When I read a real headline, it's on screen, highlighted in yellow while I read it. When a number matters, the article tilts in and a red marker underlines the number.
 B-rollGood Luck Charlie, Ready or Not, Billboard, the TODAY antenna: the face cam moves to the corner while each plays.
 Animated textThe article tilts in and a red marker underlines the number. Click to watch it.
 Picture in pictureThe guest gets a window of her own: Bridgit at TechCrunch Disrupt, over a Mac desktop, while I keep talking.
That's the difference between telling and proving. A talking head says « this was in the news ». A pro edit shows the news. Here's animated text that points at the proof.
YouTube's help page says the same thing from the other side: when you film, get extra footage for B-roll. You can't show what you didn't film or find.
5. Give a guest their own frame
The last one is small, and it's very pro.
When Bridgit comes into the story, she gets a window of her own: Bridgit at TechCrunch Disrupt, over a Mac desktop, while I keep talking. Picture in picture. You never lose the speaker, and you still see who they're talking about.
It's the third card in the row above. Pretty simple, right? But it's the kind of thing you notice on big channels and never on your own.
Work from notes, not from the timeline.
Okay. Now, how do you actually get to all five?
Here's how I work. I watch the whole cut once, all the way through, without touching anything. Then I go back and leave notes: I pause at the moment that's wrong, point at the spot of the picture, and say what's wrong. « Cut this pause. » « The color jumps here. » « Show the headline when I say it. » Then I fix them all at once.
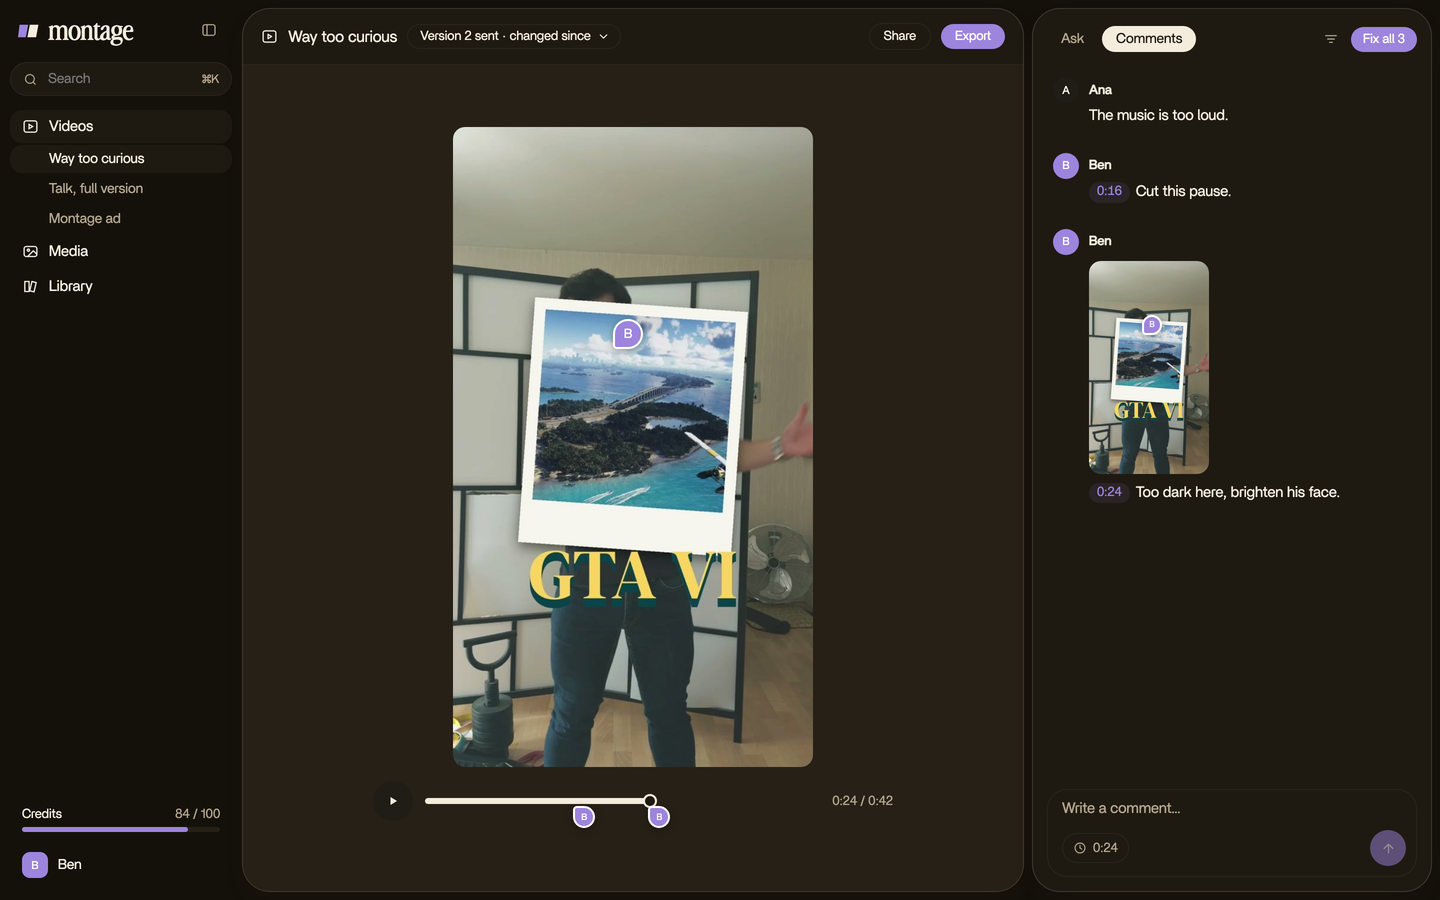
Why does that work? Because you judge the video as a viewer, not as an editor. You see the whole thing first, then you fix it. If you're still placing clips while you watch, you'll never see what your viewer sees.
Watch it like a viewer. Fix it like an editor.
Beginner edit vs pro edit.
Let's put them side by side.
| Beginner edit | Pro edit | |
|---|---|---|
| The cut | Keeps most of what was filmed | Keeps the best take of each line (33 minutes to 9:18, 216 cuts) |
| The color | Each take as it came out of the camera | One look across every take |
| What comes back | Remade each time, a little different | Built once as a component, reused (a media card used 26 times) |
| While you talk | Your face, the whole time | The clip, the headline, the number, on screen |
| A guest | Mentioned | Shown, in a window of their own |
| How it gets fixed | Shot by shot, while editing | Watched once, then notes on the picture, fixed all at once |
Do you see the difference? Not one line of that table is about which program you used.
Do you need pro software?
Sure. If you want a job as an editor, learn Premiere Pro or DaVinci Resolve. Adobe calls Premiere « the go-to for pro video », and DaVinci Resolve has a free version. There are years of tutorials for both.
But if you want your videos to look pro? Truth is, the habits above are what count. And here's an honest answer from a Reddit thread on r/NewTubers, as Google shows it: « The free version of DaVinci Resolve can do anything he did in the video I watched. »
So the question isn't the software. It's who does the hand work. You can do it yourself on a timeline. Or you can describe the edit to an AI video editor for YouTube, like Montage, and spend your time on the decisions.
Two more things, since people ask:
- Online: Montage runs in your browser, and your original files stay on your computer.
- Handing it to an editor later: Montage exports the MP4, the sound only, or the cut for Premiere Pro or DaVinci Resolve. Nothing is lost if a pro takes over.
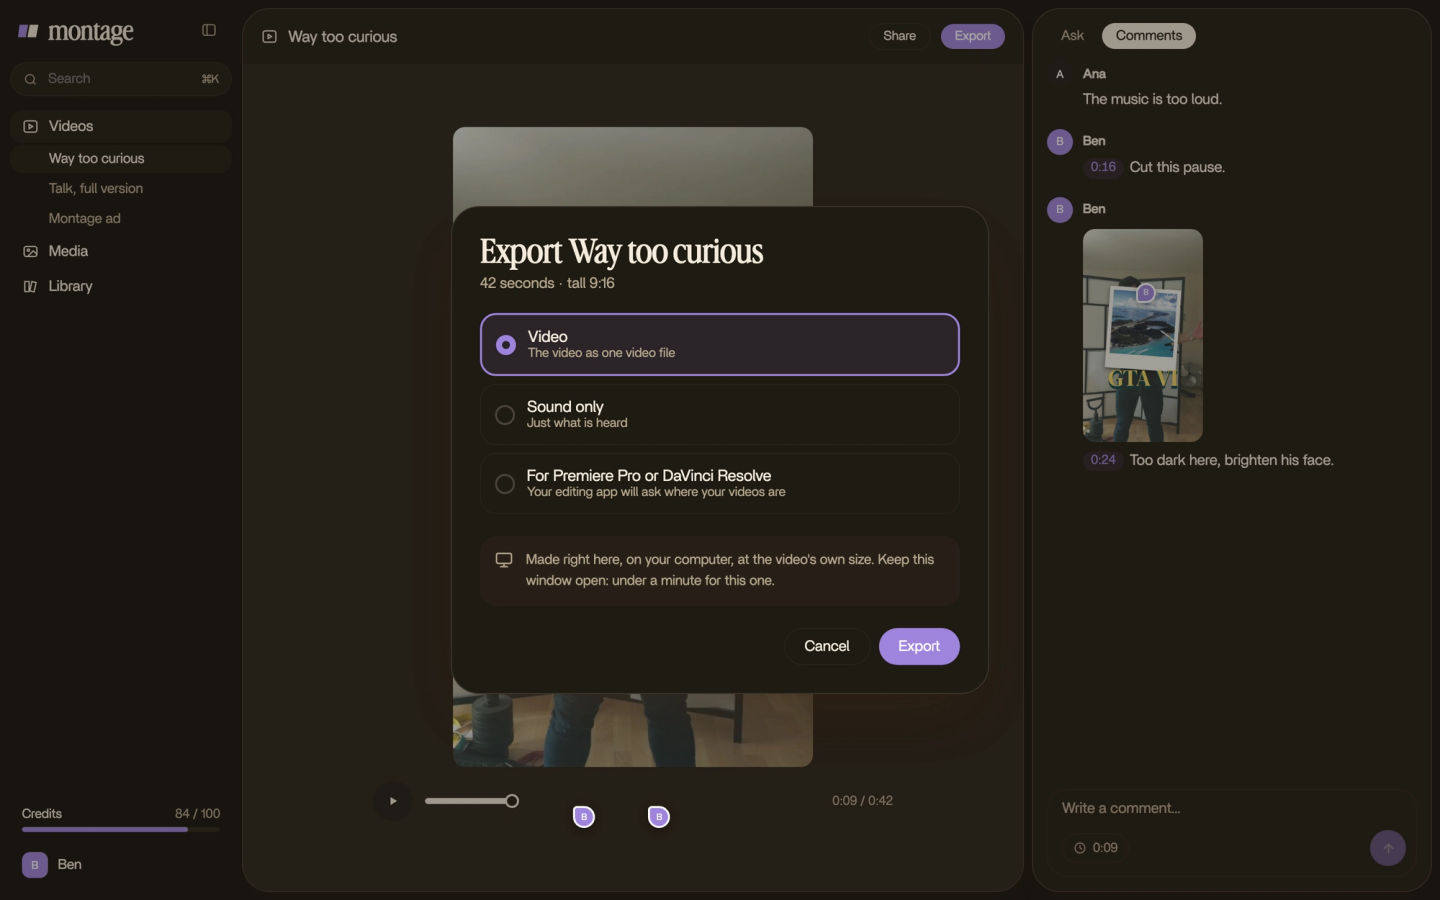
If you're still choosing a program, here's which editing software to pick. And for the small stuff, here are some everyday video editing tips.
Questions about editing a video like a pro.
How do I edit my video like a pro?
Cut hard and keep only the best take of each line. Match the color across every take. Build the parts that come back
(your face cam, your cards) once, and reuse them. Show what you talk about while you talk. Then watch the whole cut once
and fix it from notes.
What do professionals use to edit video?
Premiere Pro and DaVinci Resolve are the two you'll hear about most. Adobe calls Premiere « the go-to for pro video »,
and DaVinci Resolve has a free version.
Can I edit a video like a pro for free?
Yes. The free version of DaVinci Resolve goes a long way. What makes an edit look pro is the five habits, not the price
of the program.
What is the 3:2:1 rule in video editing?
It's a backup rule: keep 3 copies of your footage, on 2 different kinds of storage, with 1 copy somewhere else, like the
cloud.
See the whole film.
Everything in this article is in one real film, each part asked for in words. Watch the whole film and how it was made, next to the three others.
 9:18
 2:07
 0:56
 0:38
That's it for this one. Pick one habit, and use it on your next video.
See you in the next one.