How to film yourself:
set up, film, then fix it.
Nobody behind the camera? That's fine. Get three things right when you film, and fix the rest in the edit. Here's how, with three real shorts filmed alone.
 Ben, founder of Montage · · 8 min read
In this post10 parts
The short answer.
Let's start with the answer.
How to film yourself, when nobody is behind the camera: put the light in front of you, the lens at eye level, and the mic close to your mouth. Look at the lens. Say each line more than once. Film the things you'll talk about. Then stop worrying about the rest, because the rest can be fixed in the edit.
That last part is what most guides skip. They tell you to buy a second camera, a gimbal, filters. Sure. But for a video of you talking to the camera? You need very little on set, and a lot more in the edit: a way to grade footage that's too dark or flat, to turn upside-down shots the right way up, to add movement nobody was there to film.
Film it simple. Fix it in the edit.
What you can't fix later, and what you can.
So what really matters on set? Let me explain.
Some problems die on set. No edit brings them back. Others look bad when you film, and they're gone a few minutes later. Here's the split, so you know where to spend your energy.
| The problem when you film yourself | Fix it on set or in the edit? | How |
|---|---|---|
| Bad sound (echo, far from the mic, wind) | On set | A mic close to you, a quiet room |
| Out of focus | On set | Check the shot before you start talking |
| Your head cut off at the top | On set | Check the frame, leave space above your head |
| Too dark | In the edit | A color grade lifts it |
| Flat, grey picture (Apple Log, HDR) | In the edit | A LUT or a grade |
| Shots filmed upside down from above | In the edit | Rotate them |
| A still frame, nobody to move the camera | In the edit | Tracking, slow push-ins, zooms |
| A busy room behind you | In the edit | Cut yourself out of the background |
Do you see the pattern? The sound, the focus and the frame are yours. The picture's light, its color and its movement can wait.
Before you film: the set-up that matters.
Okay. Three things, and they're cheap.
1. The light in front of you
Face the window. Never put it behind you, or you become a silhouette. NYU's guide on recording yourself says the same: shoot in daylight if you can, with the window or your main light facing you, not behind you. PremiumBeat adds: avoid harsh, direct sun. Soft light from the front is all you need.
2. The camera at eye level, the back lens
Put the phone or the camera at the height of your eyes, on a tripod, or on a stack of books on a table. If you film on a phone, PremiumBeat's advice is to use the back camera, not the selfie one, and to film in at least 1080p. More on filming yourself with just a phone.
3. The sound close to your mouth
This is the one I'd never skip. A small lavalier mic clipped on your shirt beats the best camera in the room. One of the pros PremiumBeat interviewed put it this way: audio makes up « fifty percent » of a video. Whatever the number, a video people can't hear is a video they leave.
You can fix the picture after. You can't fix the sound.
How to film yourself, step by step.
Here's how I'd do it. Seven steps.
- Check the shot first. Press record, sit down, then watch the first five seconds back. Is your face sharp? Is there space above your head? Pond5's guide says it too: review the shot before you move the camera.
- Look at the lens, not the screen. Your eyes on the screen look like your eyes on the floor.
- Say each line two or three times. You'll keep the best one, and cut the rest with jump cuts between takes.
- Don't stop when you stumble. Pause, breathe, say the line again. The pauses and the ums come out in the edit.
- Film the things you'll name. The book, the notebook, the screen. Five minutes of extra shots after you're done talking.
- Film from above if you need to. A notebook, your hands, your desk. Upside down is fine. It gets rotated after.
- Move if you want to. Walk around the room, stand up, sit back down. A camera that doesn't move can still follow you in the edit.
Honestly, you don't need a gimbal for a talking-head video. You need takes.
Film for the edit.
So what do you do while the camera rolls? Here's the thing: you're not filming a video. You're filming the pieces of one.
A question that keeps coming up on Reddit: film everything in one go, or take several takes? My answer: several takes, and the things you'll talk about. That's the material the edit puts together. When you say « my notebook », the notebook shows up on screen. That's B-roll footage, and you film it yourself, in five minutes, with the same phone.
 B-rollWhile I talk, it cuts to the right shot: the book, the notebook, the whiteboard.
 Background effectCut out of my background, my head rises over the top of the frame.
In How to be creative, it cuts to the book, the notebook and the whiteboard while I talk. In Edit it all with AI, my room didn't stay behind me: I'm cut out of my background, and my head rises over the top of the frame. Need ideas for what to film around you? Start with the objects you name.
After you film: fixing the picture.
Now the good part. Three shorts, all filmed alone, all with problems. Let me show you each one.
Too dark, or flat on purpose
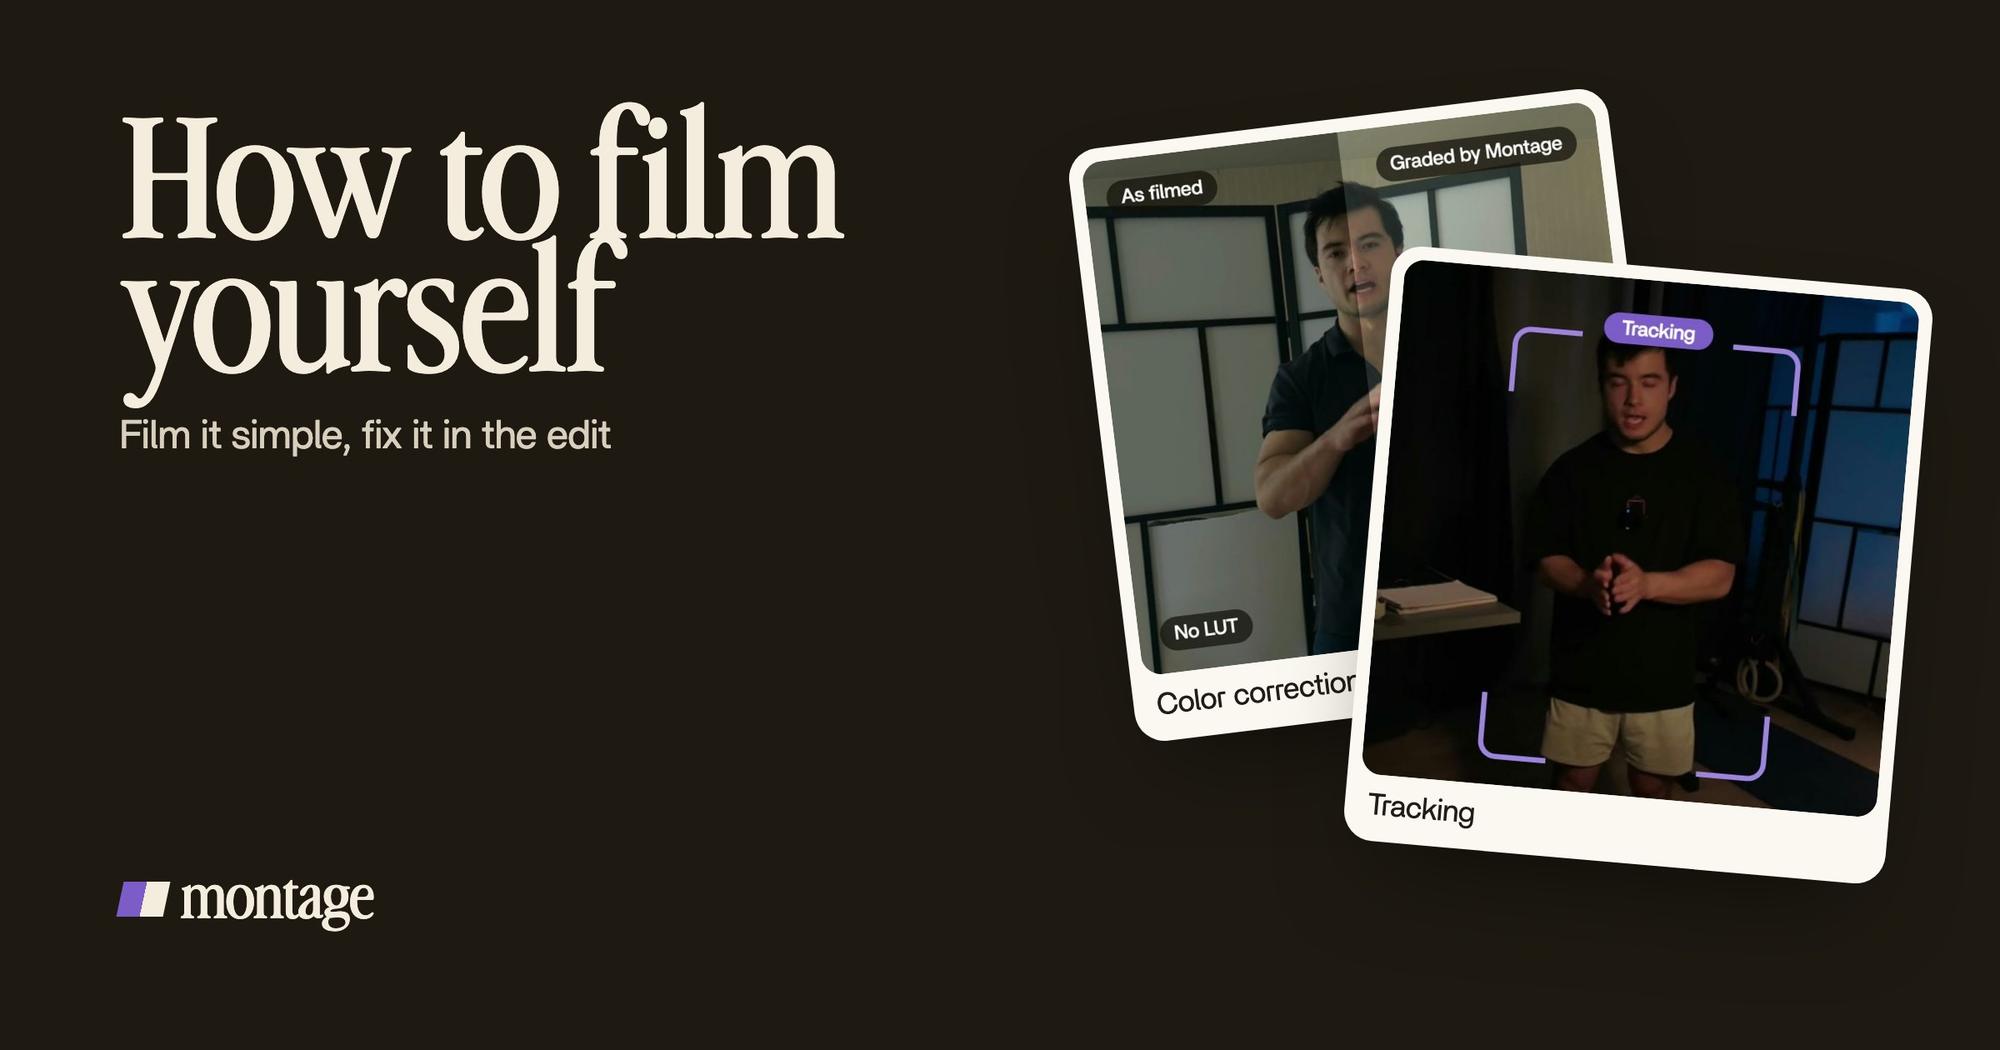
 Color correctionFilmed too dark on an iPhone. I asked for a grade, no LUT: Montage lifted it on its own. Same frame, split.
 Color correctionFilmed flat in Apple Log, my LUT on every shot. Same frame, split down the middle.
 Color correctionFilmed flat in HDR, the NOMAD LUT on every shot. Same frame, split.
Way too curious was filmed too dark on an iPhone. I asked for a grade, no LUT, and Montage lifted it on its own. How to be creative was filmed flat in Apple Log, with my LUT on every shot. Edit it all with AI was filmed flat in HDR, with the NOMAD LUT on every shot.
Filming flat is a choice: the picture looks grey on set, and it keeps more to work with in the grade. You just can't forget the grade.
Nobody to move the camera
 TrackingLocked on me: Montage tracks me as I walk around the room.
 ZoomsA slow push-in on every shot, and on « everything » and « curious » the picture pulls back on black.
 RotateThe notebook shots were filmed from above, upside down. Montage turned them the right way up.
When you film yourself, the camera sits still. Pond5's guide suggests faking camera movement in post, with small zooms, and says « don't go overboard ». Here's that, done on real videos.
In How to be creative, Montage tracks me as I walk around the room: a frame that follows you. In Way too curious, there's a push-in on every shot, and on « everything » and « curious » the picture pulls back on black. And the notebook shots I filmed from above, upside down? Montage turned them the right way up.
How the fixing gets done.
There's no timeline to learn. You drop the takes in, say what you want, and comment on what's wrong. Here's what that looks like.
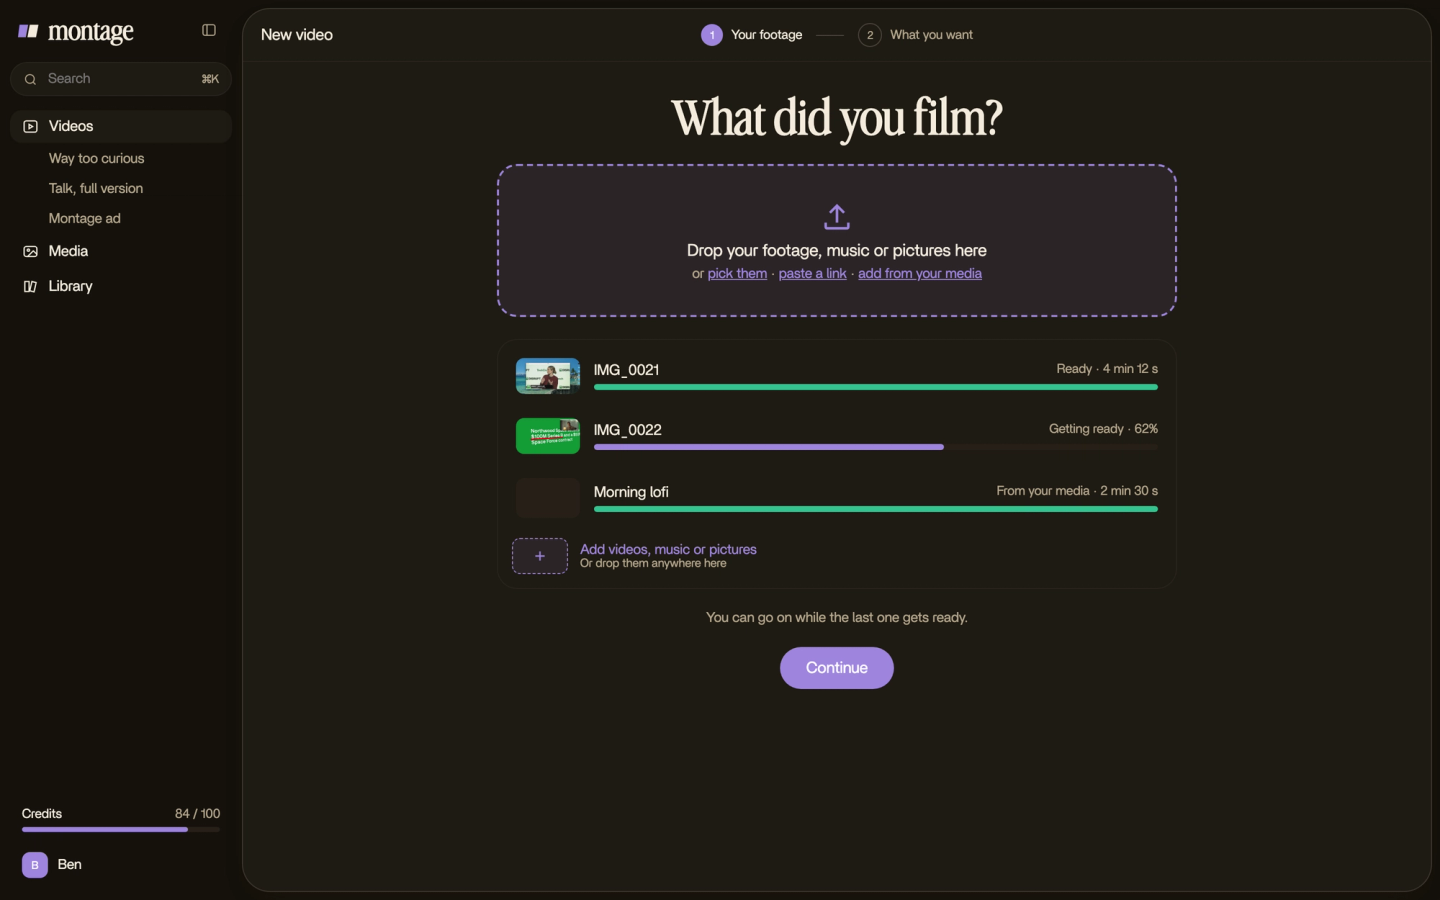
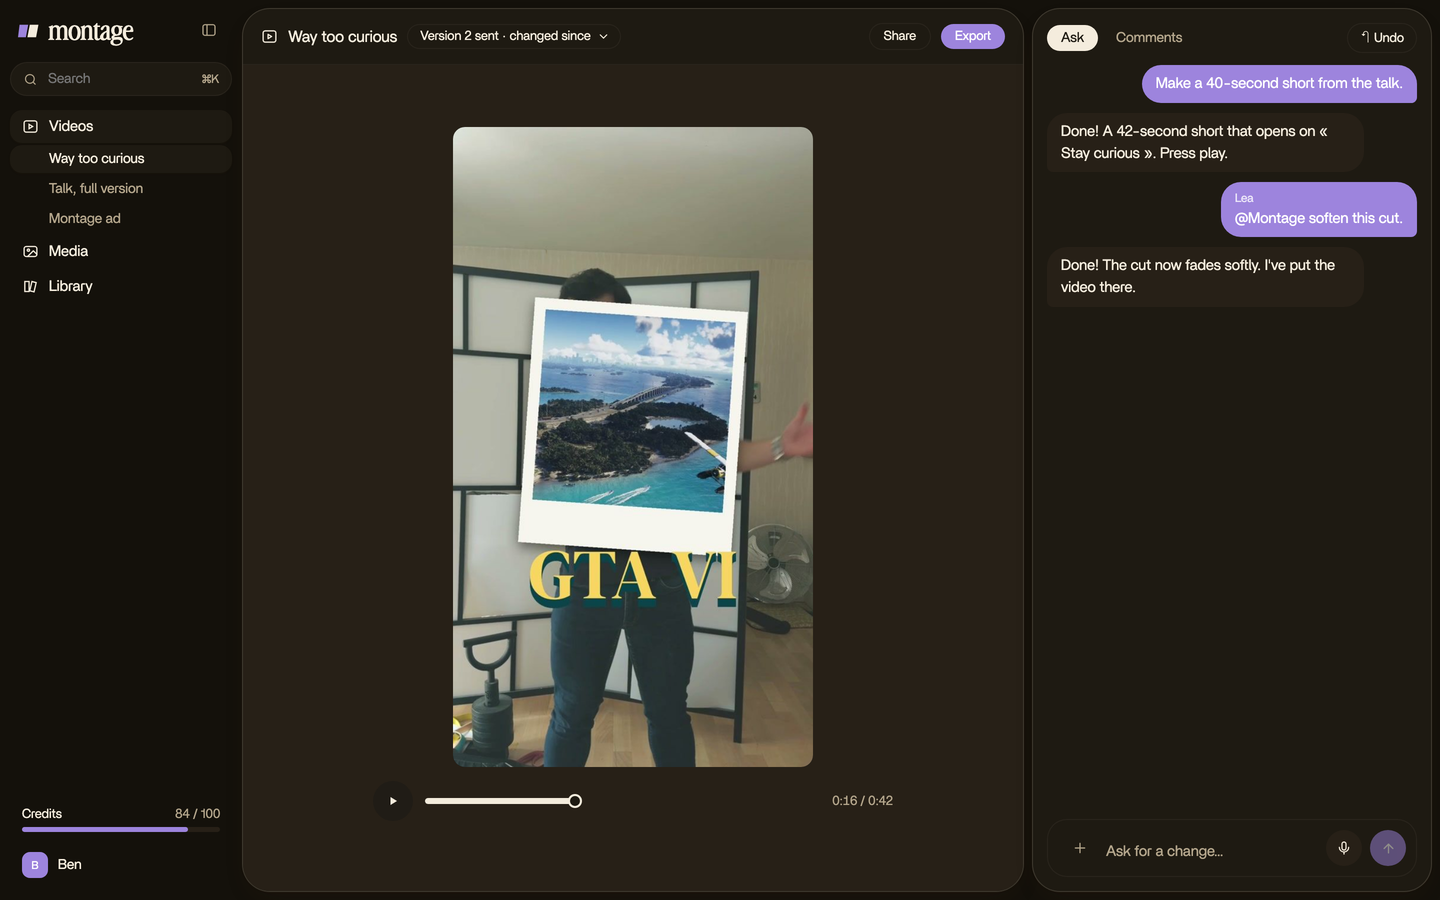
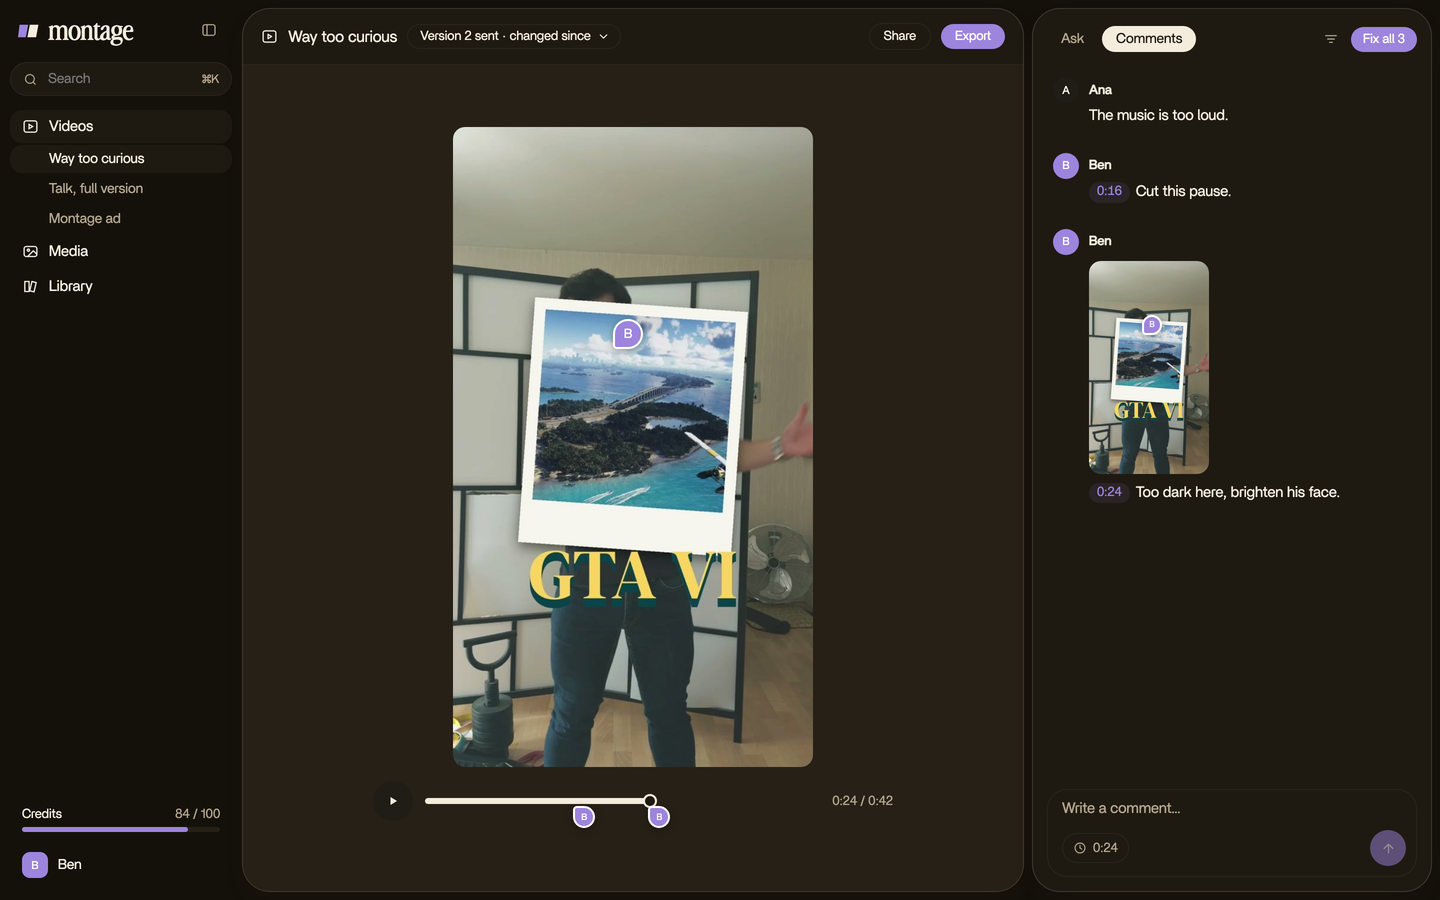
That's it. Montage edits what you filmed. It doesn't film or record anything for you.
Who this isn't for.
Let's be clear. If you film cinematic travel shots alone, on hikes, at sunset, you'll still want the gear the other guides list: a gimbal, ND filters, a few lenses. And if you film with two cameras, learn the 180° rule PremiumBeat explains, so you stay on the same side of the line between the cameras.
For a video of you talking to the camera, a short or a YouTube video, that gear isn't what holds you back. The takes are. Here's more on making a talking head video once you've filmed it.
Questions about filming yourself.
What is the best way to film yourself?
Light in front of you, the lens at eye level, the mic close. Look at the lens, say each line more than once, and fix the
rest in the edit.
How do I film myself with my phone?
Use the back camera, at least 1080p, on a tripod or a stack of books. Face a window. The full guide: filming yourself with
a phone.
How can I record a video of myself with nobody to help?
Check the shot before you start, film several takes, and film the things you'll mention after. The movement, the color
and the cuts come in the edit.
Should I film in one take or several?
Several. Say each line two or three times, keep going when you stumble, and keep the best take of each line.
What can't be fixed after filming?
Sound that wasn't recorded well, a shot out of focus, and a head cut off at the top of the frame. Get those right on set.
See it in real videos.
Every fix shown in this guide was done on real videos, each one asked for in a sentence. Watch the real videos, and what went into each one.
 9:18
 2:07
 0:56
 0:38
That's it for this one. Now face the window and press record.
See you in the next one.