How to film yourself with a phone:
eight steps.
The phone in your pocket is good enough. Here's how to set it up in eight steps, and what went wrong in three real videos I filmed on an iPhone.
 Ben, founder of Montage · · 9 min read
In this post7 parts
The short answer.
Ladies and gentlemen, let's start with the answer.
How to film yourself with a phone? You need four things right: light in front of you, a quiet room, the phone steady at eye level, and focus locked on your face. Then you film in short takes, not one perfect take, and you leave the rest for the edit.
That's it. Honestly, the phone you have is good enough. The light isn't, most of the time.
The eight steps are below. After them, I'll show you three real videos I filmed on an iPhone, what went wrong in each, and what the edit could still fix. Filming with a camera or a webcam instead? Here's the guide to filming yourself with a camera or a webcam. And if you've never edited anything, start with video editing for beginners.
How to film yourself with a phone, step by step.
1. Charge it, clear it, silence it
Charge the phone and free up storage before you start. Eleven, a video agency, puts this first in its tips for filming yourself on a smartphone. The University of Reading's guide to filming on your phone adds two more: turn on Do Not Disturb, so a call doesn't stop the take, and clean the lens.
Pretty simple, right? But a smudge on the lens makes the whole video look soft, and no edit brings that back.
2. Face the light
Sit facing a window. Never with a window or a lamp behind you: both Reading and Eleven say it. With the light behind you, the phone exposes for the bright part and your face goes dark.
3. Find a quiet room
Close the windows. Turn off the fan. Sound matters more than you think. Reading puts it this way: « viewers are typically much less forgiving of bad sound than bad visuals ». Eleven suggests a cheap external mic if you film outside.
Fix the sound before you film. Fix the light after, if you must.
4. Put the phone at eye level, and keep it still
A tripod is best. No tripod? Eleven says a table at least, with the phone propped up. Then frame yourself: head and shoulders in the shot, the camera at the height of your eyes, not below your chin.
Turn on the grid lines in the camera settings. Reading uses them for the rule of thirds: you sit on one of the lines, not in the dead center.
5. Pick the shape: vertical or horizontal
Decide before you press record. Reading's rule: portrait (vertical) for social media, landscape (horizontal) for YouTube. Vertical is 9:16, for TikTok, Reels and Shorts. Horizontal is 16:9.
Two of my three videos below are vertical shorts. The long one is horizontal, for YouTube.
6. Set the camera
- Resolution and frame rate: 1080p or 4K at 30 frames per second for talking, 60 when you move. That's from Telesin's guide to filming yourself with a smartphone.
- Focus and exposure: lock them on your face. On iPhone, tap and hold on your face until the lock appears (Reading). Then the phone stops hunting every time you move your hands.
- Zoom: « move in, don't zoom in », says Reading. Digital zoom lowers the quality. Move the phone closer instead.
- Hands-free: start with the timer or a Bluetooth remote, as Telesin suggests, so you're not reaching for the phone.
One warning. If your iPhone films in Apple Log, or in HDR, the footage can look flat and grey until it's graded. It's not broken. It just needs a LUT or a grade in the edit. More on that below.
7. Film a test clip, and watch it with sound
Ten seconds. Then watch it back with headphones. Is your face sharp? Is it bright enough? Can you hear a fan? Reading says to record a test and play it back before the real thing. It's also the easiest step to skip. Don't.
8. Film in takes, then film the extra shots
Don't try for one perfect take. Say each line, and when you trip, stop and say the sentence again from the start. Leave the pauses. The edit cuts them.
Then, before you put the phone away, film the things you talk about: the book, the screen, the place. Those extra shots are B-roll footage, and they're what people see while you keep talking. Not sure what to film? Here are ideas for what to film besides your face.
One thing Reading warns about: don't film a computer screen with your phone. It flickers.
What went wrong in three real iPhone videos.
So what actually goes wrong when you film yourself alone? Let me show you. These are three of my videos, filmed on an iPhone, and the mistakes are real.
The light: too dark, or flat
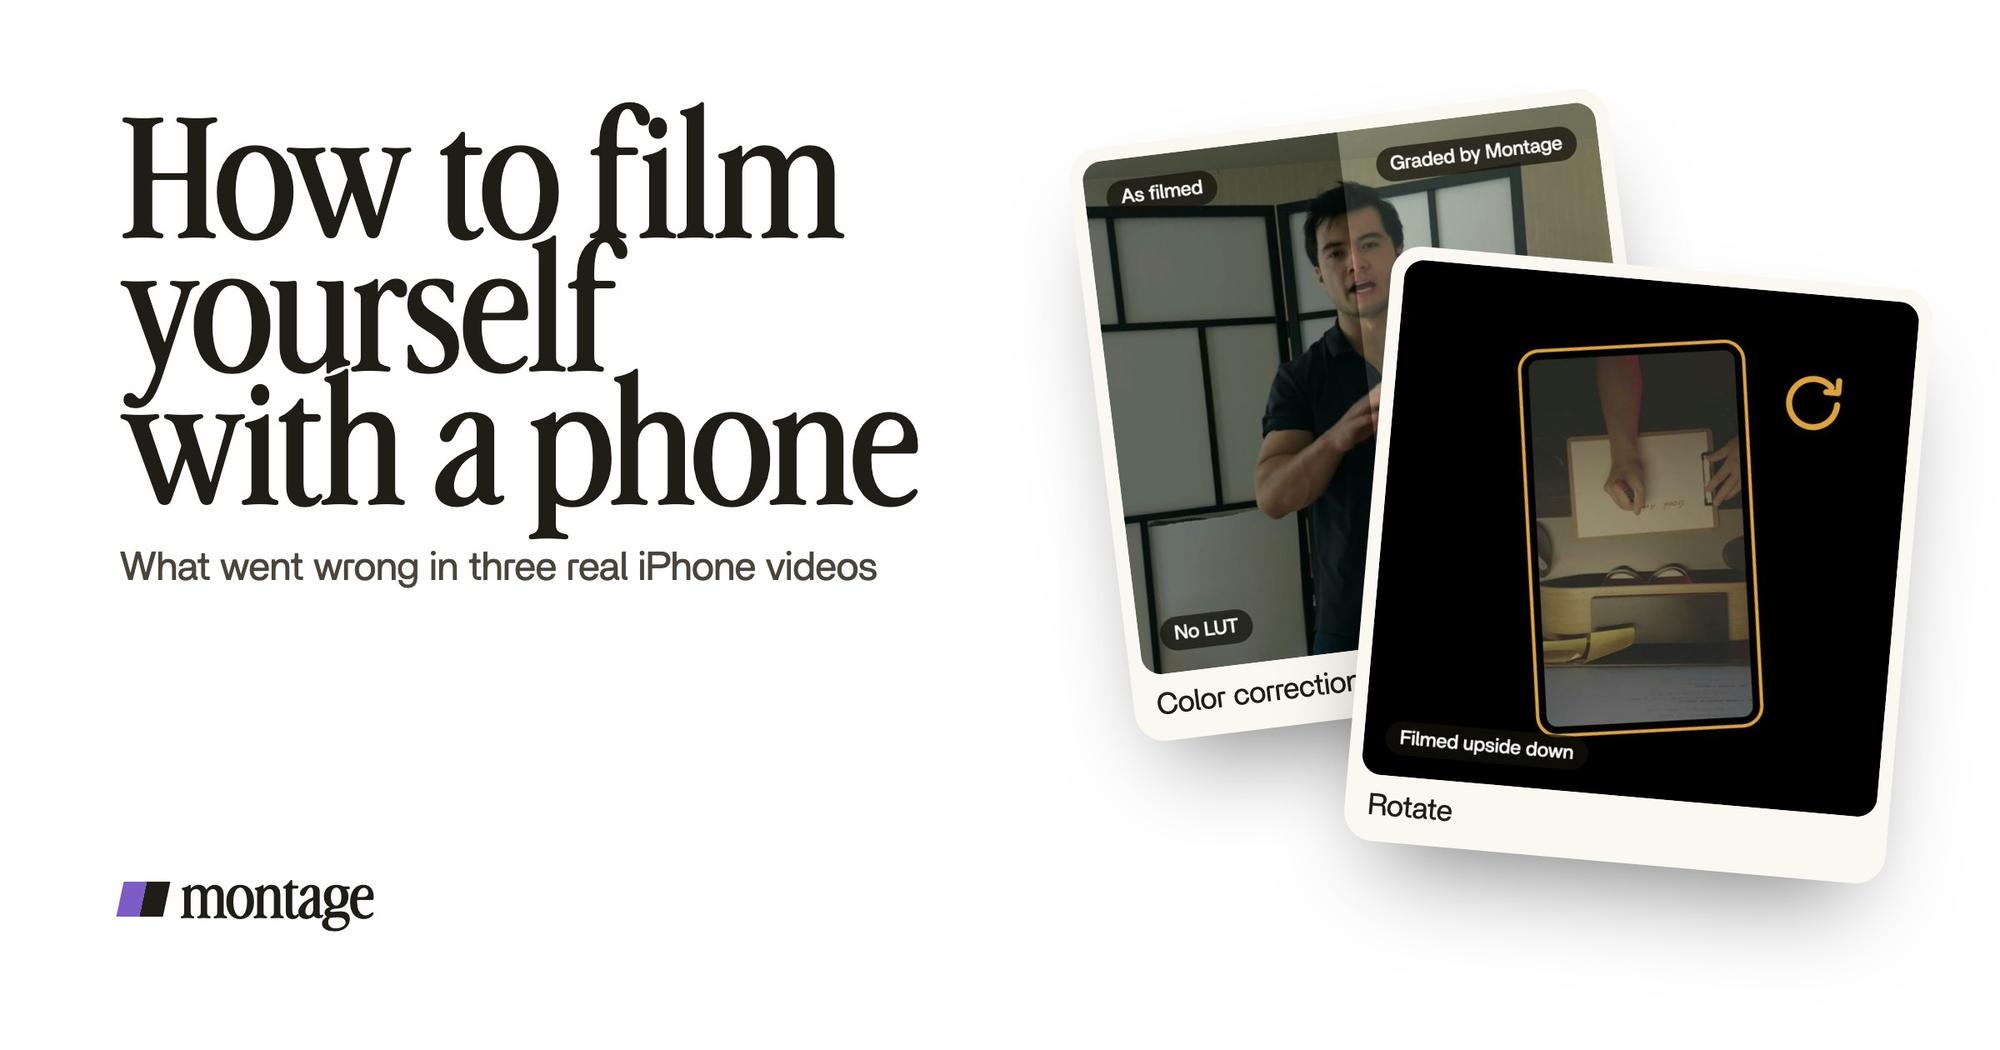
 Color correctionFilmed too dark on an iPhone. I asked for a grade, no LUT: Montage lifted it on its own. Same frame, split.
 Color correctionFilmed flat in Apple Log, my LUT on every shot. Same frame, split down the middle.
 Color correctionTakes 4 to 7 were filmed flat: the NOMAD LUT on each, the first three left as they were. Same frame, split.
- Way too curious (56 seconds, vertical) was filmed too dark on an iPhone. I asked for a grade, no LUT, and Montage lifted it on its own.
- How to be creative (2 minutes 7 seconds, vertical) was filmed flat in Apple Log. It looks grey until a LUT goes on, so my LUT went on every shot.
- From Disney star to space CEO (9 minutes 18 seconds, horizontal) is 33 minutes of footage from an iPhone, in seven takes. Takes 4 to 7 were filmed flat, the first three weren't. So the NOMAD LUT went on takes 4 to 7 only.
Do you see the pattern? None of the three needed a better phone. They needed a grade or a LUT. And in the long one, the setting changed between takes, so check it before every take. Here's how to fix footage that's too dark.
The angle and the movement
 RotateThe notebook shots were filmed from above, upside down. Montage turned them the right way up.
 TrackingLocked on me: Montage tracks me as I walk around the room.
In How to be creative, the notebook shots were filmed from above, upside down. Montage turned them the right way up. Same video: I walk around the room while I talk, and Montage tracks me, so the frame follows you instead of losing you at the edge.
And if you film running or walking? Use 60 frames per second (Telesin), and know that the edit can keep you in the frame. A shaky phone is another story: keep it steady when you film.
A fixed phone that doesn't feel fixed
 Zooms
A phone on a tripod gives you one angle for the whole video. In Way too curious there's a slow push-in on every shot, and on two words the picture pulls back on black. The zoom is done in the edit, so the video doesn't feel static.
What you fix before you film, and what the edit can fix.
Okay. Here's the whole thing in one table. It tells you where to spend your effort on set.
| Problem | Fix it before you film | Can the edit fix it? |
|---|---|---|
| Bad sound (echo, fan, wind) | A quiet room, windows closed, a mic outside | No. Fix it on set |
| A blurry face | Clean lens, focus locked on your face | No |
| A window or lamp behind you | Face the light | Barely. Your face stays dark |
| Framing that cuts your head | Head and shoulders, eye level, grid lines | Not without losing picture |
| A shaky phone | A tripod, or a table at least | Don't count on it. Keep it still |
| Too dark | Face a window | Yes: a grade (Way too curious) |
| Flat Apple Log or HDR footage | Know your setting | Yes: a LUT (How to be creative, From Disney star to space CEO) |
| A shot upside down or sideways | Check the shot | Yes: turn a shot the right way up |
| You move around the frame | Mark your spot | Yes: tracking (How to be creative) |
| Pauses, ums, retakes | Nothing. Just keep filming | Yes: cut the pauses between takes |
| Vertical or horizontal | Pick before you film | Partly: a resize crops the picture |
Spend your time on the sound, the focus and the light. The edit can't save those.
The rest? Film it, and fix it after.
After you film: from takes to a video.
So you have your takes. What now? Here's how I do it in Montage, which runs in your browser. An iPhone app is coming; for now, the takes go from your phone to your computer.
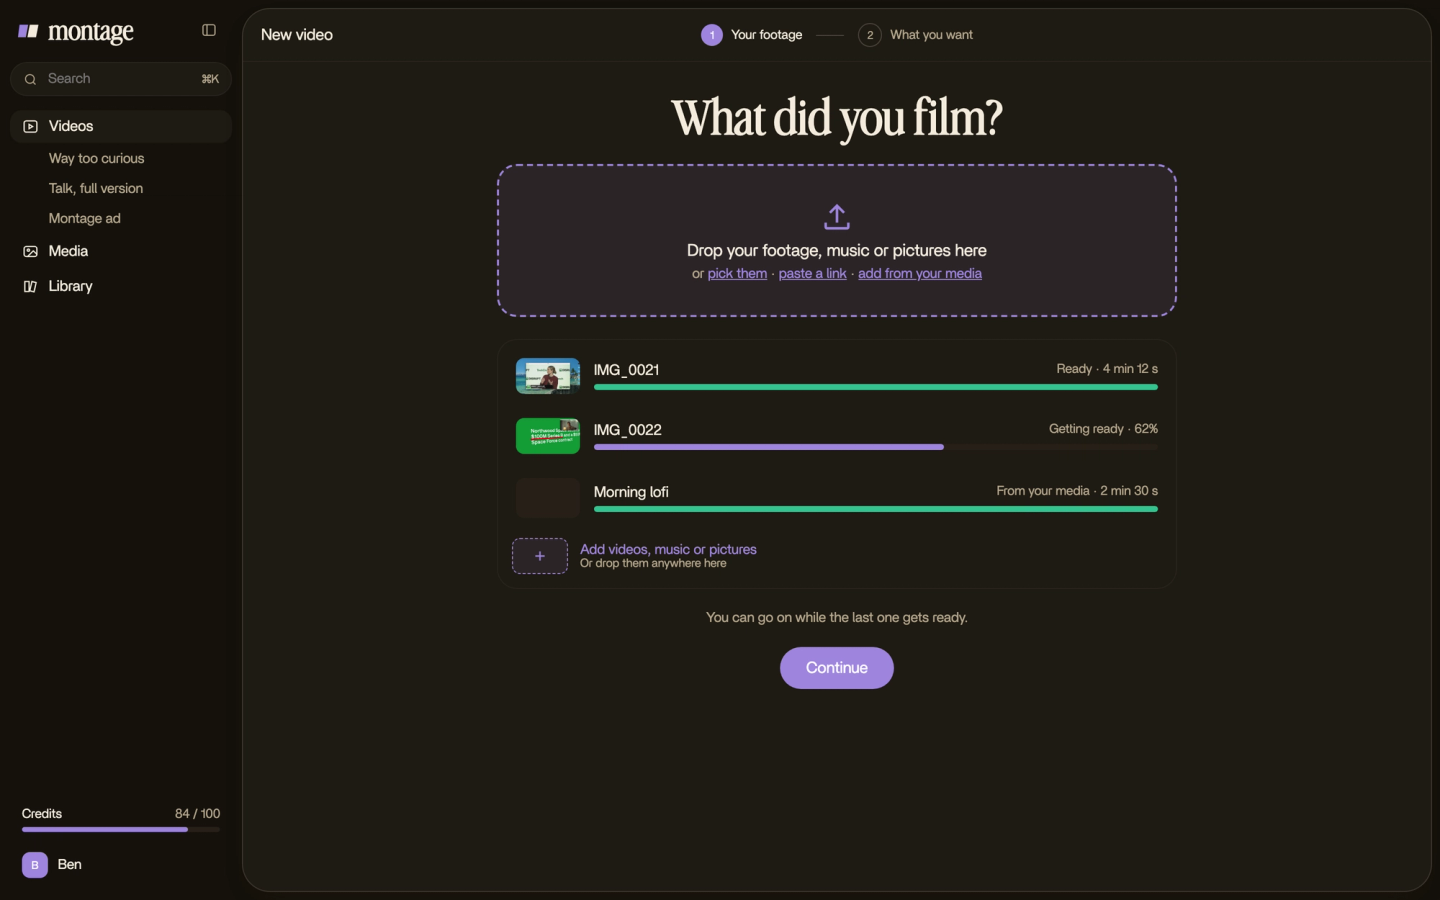
First, drop every take in, as you filmed it. No sorting, no renaming.
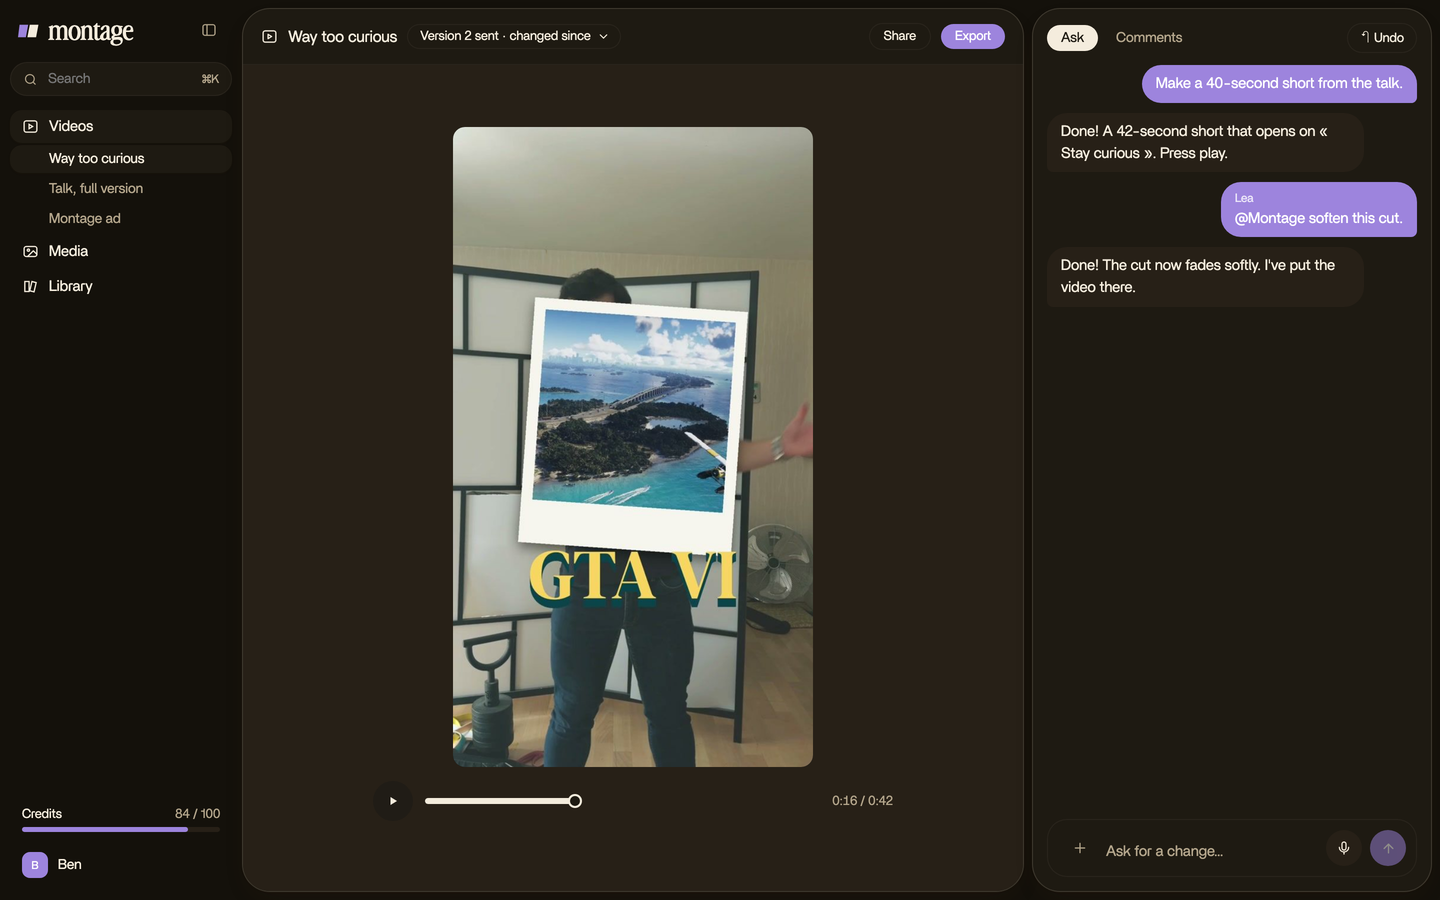
Then say what you want. For example: « A 60-second short. Cut the retakes and the pauses, grade it, captions in my font. » Montage keeps the best take of each line and makes the jump cuts between takes, and the ums go with the pauses.
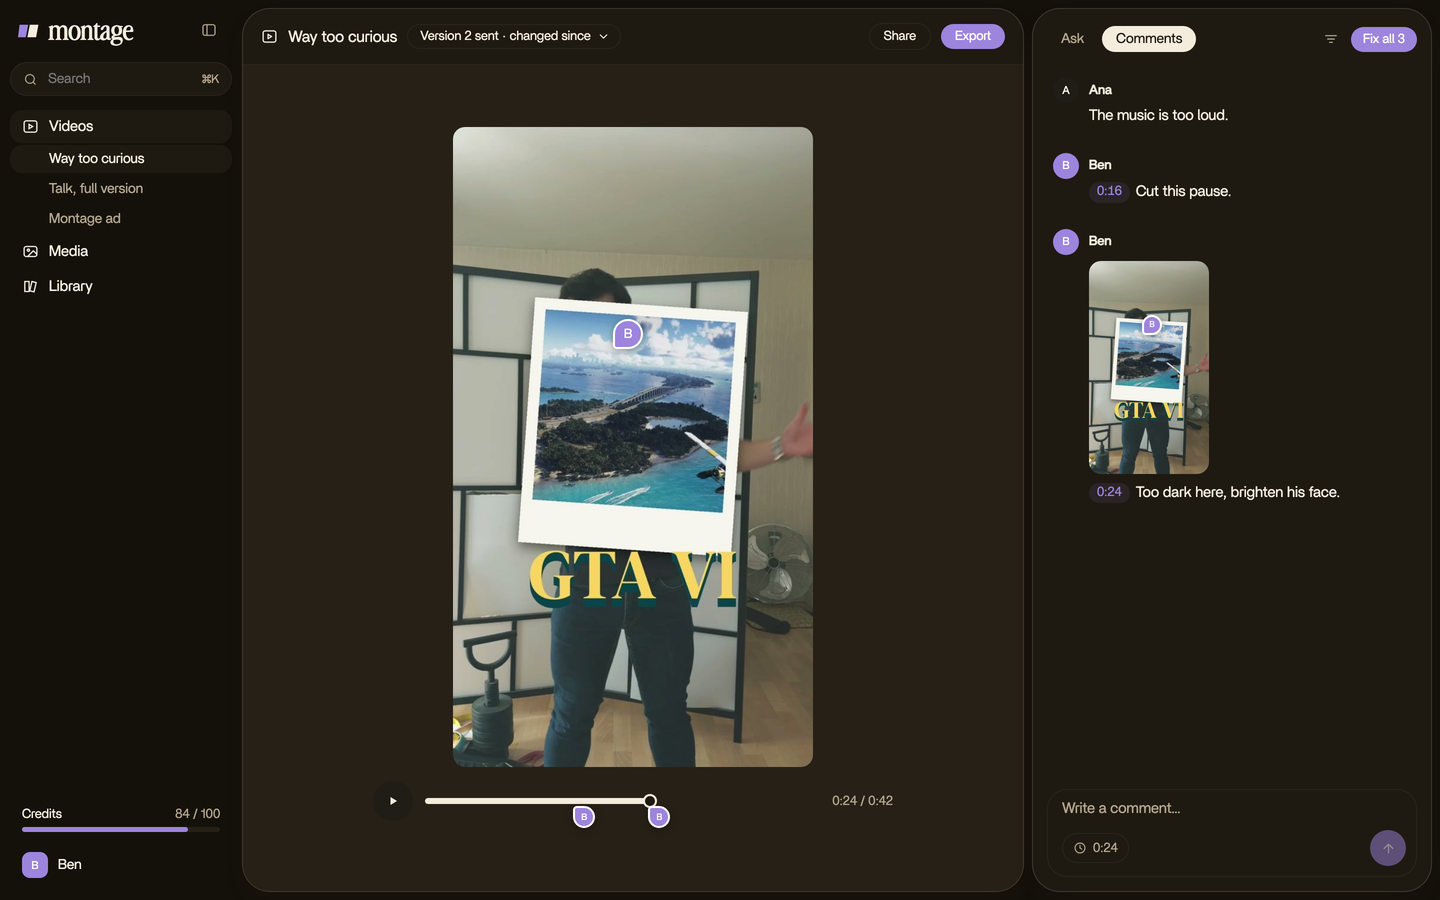
Then watch it once, and comment on what's wrong, at the moment or on the spot of the picture: « too dark here », « this shot is upside down ». Then « Fix all ». When it's right, export the video.
If you want to go further with the format itself, here's how to make a talking head video people watch to the end.
Questions about filming yourself with a phone.
How do you film yourself with a phone?
Face a window, in a quiet room. Put the phone on a tripod or a table at eye level, lock the focus on your face, and
record a ten-second test. Then film in short takes, restart a line when you trip, and film the things you talk about.
How do I film myself on my iPhone?
Put it on a tripod at eye level, and start with the timer or a remote. Tap and hold on your face to lock focus and exposure.
If your iPhone records in Apple Log or HDR, the footage will look flat until it's graded.
How do I film myself on an Android phone?
The same steps. The setting names change from one phone to the next, but you'll find the resolution and frame rate in
the camera's settings, and you can tap on your face to set the focus.
Can I record a video with just my phone?
Yes. All three videos in this article were filmed on an iPhone, the longest one from 33 minutes of footage. A tripod
and a quiet room help more than a better phone.
Should I film vertical or horizontal?
Vertical (9:16) for TikTok, Reels and Shorts. Horizontal (16:9) for YouTube. Decide before you film.
See the three videos.
The three videos in this article are real, filmed on an iPhone and edited by asking. The videos in the showcase show what went in and how each one was made.
 9:18
 2:07
 0:56
 0:38
That's it for this one. Now go face a window and press record.
See you in the next one.