Apple Log LUT:
where to get one and how to use it.
Your iPhone footage came back grey? That's Apple Log, and it's normal. Here's where to get the LUT that fixes it, how to put it on, and a real before and after.
 Ben, founder of Montage · · 8 min read
In this post9 parts
The short answer.
Let's start with the answer, because you've got grey footage waiting.
An Apple Log LUT is a file (usually a .cube) that turns flat, washed-out Apple Log footage from an iPhone into normal-looking
video. The technical name for that is an Apple Log to Rec.709 LUT: Apple Log in, Rec.709, the standard look of a
normal screen, out.
Which one? Honestly, start with a free conversion LUT. Apple publishes its own, and others give theirs away too (the table is below). Put it on every Apple Log shot, and only on those. Then adjust the rest by eye.
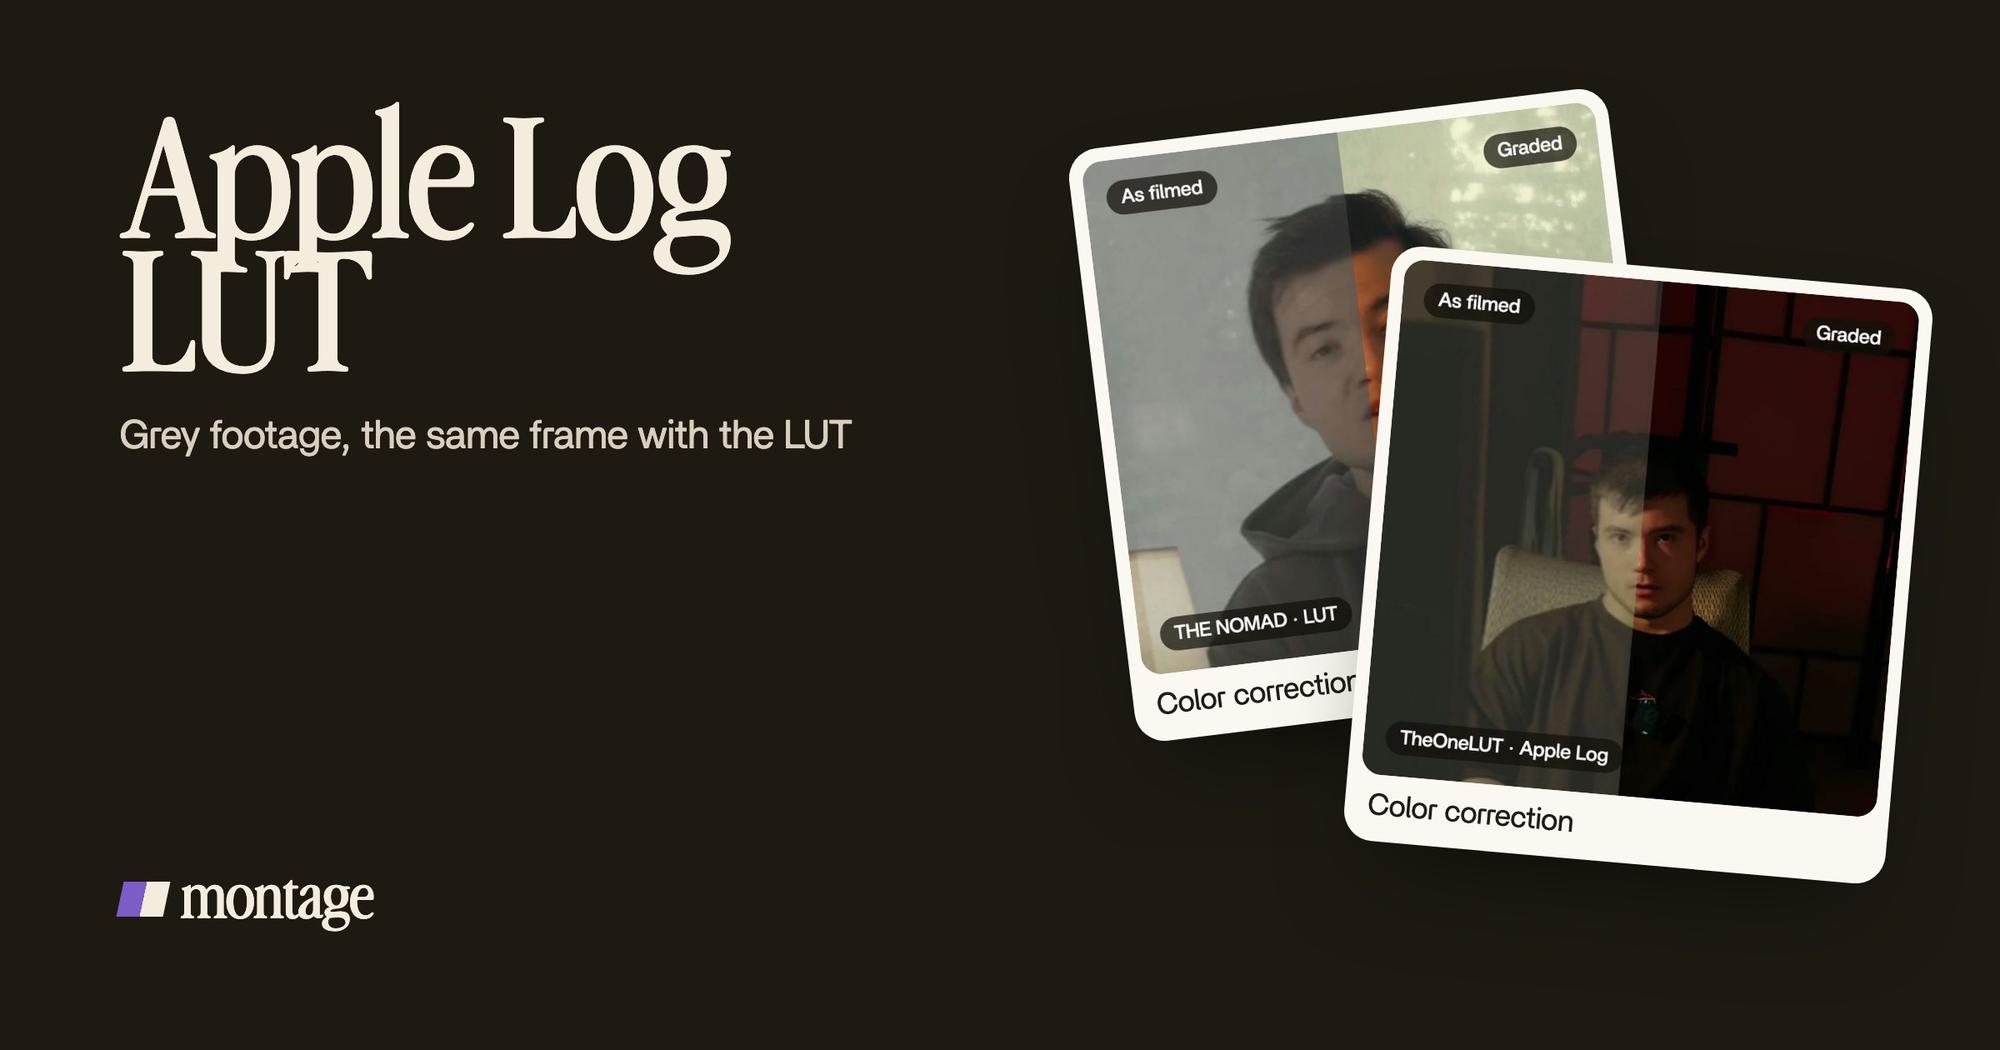
Here's what that looks like on a real video. How to be creative is a short I filmed flat in Apple Log, with my LUT on every shot. Same frame, split down the middle:
 Color correction
Left, what the iPhone records. Right, the same frame with the LUT. You can watch the Apple Log short from start to finish.
Why Apple Log looks so grey.
So why does your footage look like that? Let me explain.
Normal iPhone video is processed inside the phone: sharpening and saturation, baked in. Apple Log skips that processing and keeps more of the dynamic range, the detail in the bright and dark parts (The One LUT explains it this way on onelut.io). That's why it looks flat. It's not broken. It's raw material, waiting for color.
One more thing: Apple Log files are ProRes, and they're big (colorist Tobia Montanari points it out on his site). Make room on the phone before you film. More on shooting in Apple Log in its own guide.
Grey isn't a mistake. It's the point.
A conversion LUT vs a look LUT.
Now, here's the part most pages skip. There are two kinds of LUT.
- A conversion LUT (or technical LUT) takes Apple Log to Rec.709. It makes the footage look normal. Neutral. That's what you want first.
- A look LUT (or creative LUT) gives it a style: a film stock, warm skin, crushed blacks. It comes after.
Some files do both at once. Tobia Montanari's film looks, for example, convert Apple Log to Rec.709 and add a Kodak or Fujifilm look in one file.
Lumadune says it plainly on its own LUT page: a conversion LUT gives you a starting point, not a finished look. Exposure, white balance and skin tones are still yours to adjust. If you want the whole picture, here's what color grading is, from the start.
The LUT makes it normal. The grade makes it yours.
Where to get an Apple Log LUT (free and paid).
Okay. Here's where to get one. I haven't tested them against each other, so this table says what each one is, not which one wins. Prices as shown on their own pages, checked on 29 October 2026.
| LUT | Price | What it does | Footage |
|---|---|---|---|
| Apple's own Apple Log LUT | Free (free Apple developer sign-in) | Apple Log to Rec.709, with a white paper | Apple Log |
| Lumadune | Free, no signup | A technical conversion to Rec.709, 33- or 65-point .cube |
Apple Log and Apple Log 2 |
| Cinecolor | Free | Apple Log 2 to Rec.709, neutral and lightly stylized | Apple Log 2 |
| Tobia Montanari's film looks | Kodak D65 free, the pack paid | Conversion and a film look in one file | Apple Log |
| The One LUT | $39 | Apple Log to « Arri Rec 709 », modelled on Arri's K1S1 LUT | Apple Log and Apple Log 2 |
| DaVinci Resolve 18.6 and later | Free (built in) | Not a LUT: a Color Space Transform with Apple Log as the input | Apple Log |
Where's Apple's? It's on Apple's developer downloads page: search « Apple Log profile » (that's the answer in the Apple Community thread on Apple LUTs for the iPhone 15 Pro). Not the easiest place to find, I know.
33 or 65 points? Lumadune puts it simply: 33 for compatibility, 65 for precision. If your app takes 65, use it.
Apple Log or Apple Log 2? They're not interchangeable (Lumadune again). The iPhone 15 and 16 Pro film Apple Log; the iPhone 17 Pro and later film Apple Log 2 (per The One LUT). Use the LUT made for yours. Apple Log 2 has its own guide.
How to use an Apple Log LUT, app by app.
Here's how I'd do it. The rule first, because it saves you an hour:
One method only. The LUT, or a color space transform, or automatic color management. Never two.
If your footage comes out way too contrasty after the LUT, that's it: it was converted twice (Lumadune's explanation).
DaVinci Resolve
- Open the Color page and select an Apple Log clip.
- Either right-click the node and choose your
.cubeunder LUTs, - Or add the Color Space Transform effect instead and set Input Gamma to Apple Log (Resolve 18.6 and later). No LUT file needed.
- Pick one of the two. Not both.
Premiere Pro
- Open the Lumetri Color panel and select the Apple Log clip.
- Under Basic Correction, open Input LUT and browse to your
.cube. - Copy the effect to the other Apple Log clips. Only those.
Final Cut Pro
- Check first. Lumadune warns that Final Cut can apply its built-in camera LUT automatically.
- If it already did, don't add another one on top. A Final Cut user in the Apple Community thread found his footage already processed on import, and a second LUT made it « go crazy ».
On the iPhone, while you film
The free Blackmagic Camera app can show a LUT on screen while you film, so you see the real picture instead of grey. It can also burn the LUT into the recording (The One LUT and Tobia Montanari both describe it). Burning it in means you can't take it back later, so think about it first.
A LUT goes on every shot that needs it. Only those.
Let's be clear: a LUT is made for one kind of footage. Put an Apple Log LUT on footage that isn't Apple Log, and you wreck it.
Here's a real example. In From Disney star to space CEO, takes 4 to 7 were filmed flat: the NOMAD LUT went on each of them, and the first three were left as they were. And in Edit it all with AI, filmed flat in HDR (not Apple Log), the NOMAD LUT went on every shot. Another flat source, another LUT, the same fix.
 Color correctionTakes 4 to 7 were filmed flat: the NOMAD LUT on each, the first three left as they were. Same frame, split.
 Color correctionFilmed flat in HDR, the NOMAD LUT on every shot. Same frame, split.
And when the footage isn't flat at all? Way too curious was filmed too dark on an iPhone. I asked for a grade, no LUT, and Montage lifted it on its own.
 Color correction
So, the simple version: Apple Log wants a LUT. Normal iPhone video doesn't. It wants a correction. Here's how to correct the exposure and white balance, with or without a LUT.
Putting the LUT on without the LUT panel.
Now, there's another way to do all this. In Montage, you don't open a LUT panel. You say it: « put my LUT on every shot », as the How to be creative card at the top says it.
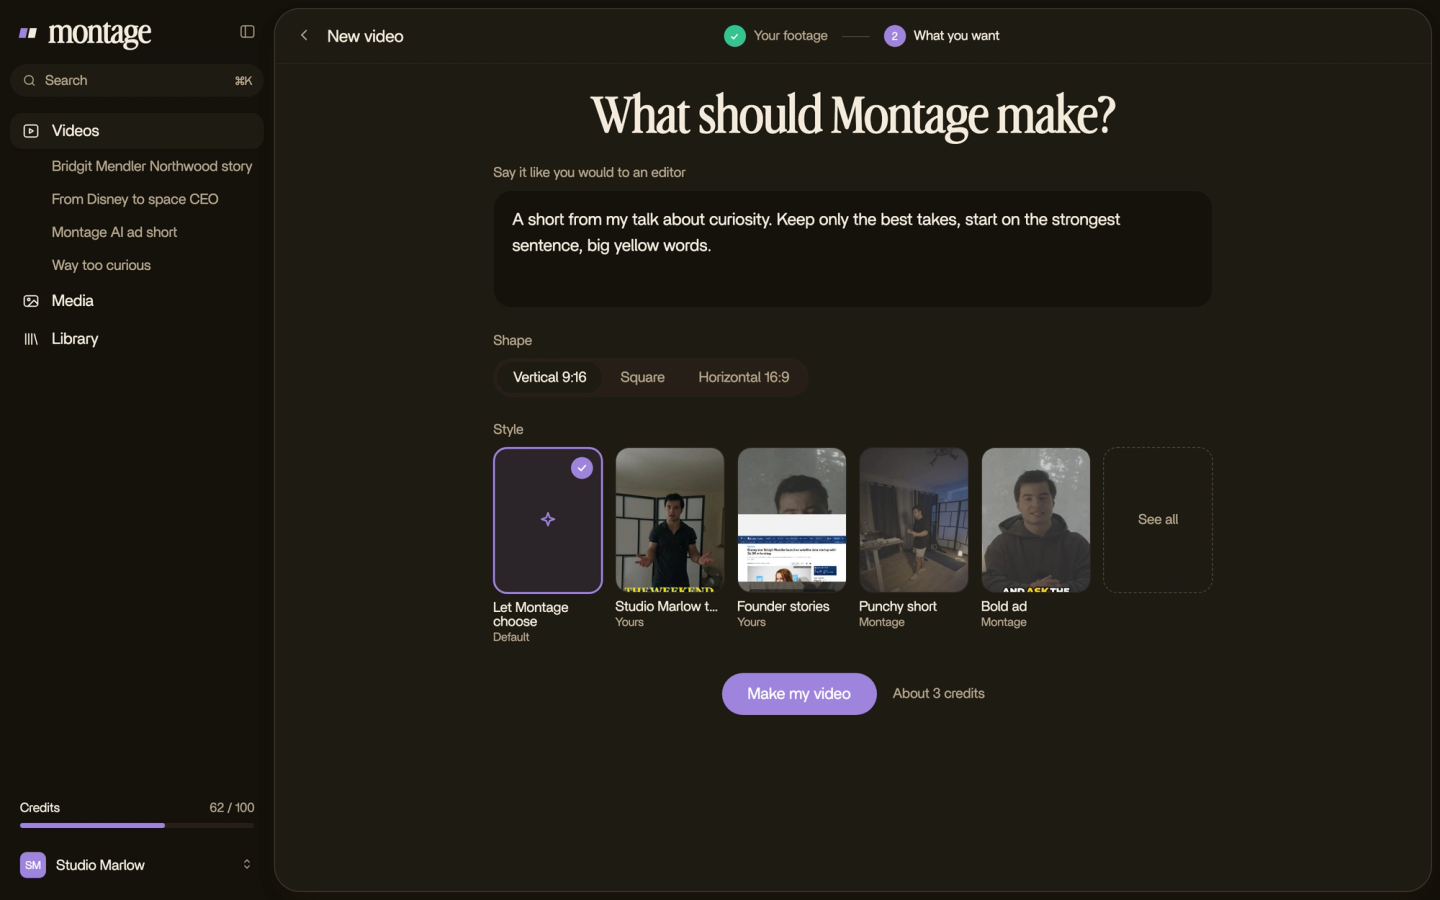
Then you watch it. If one shot still looks off, too warm, too dark, you pause, click on the picture and say what's wrong.
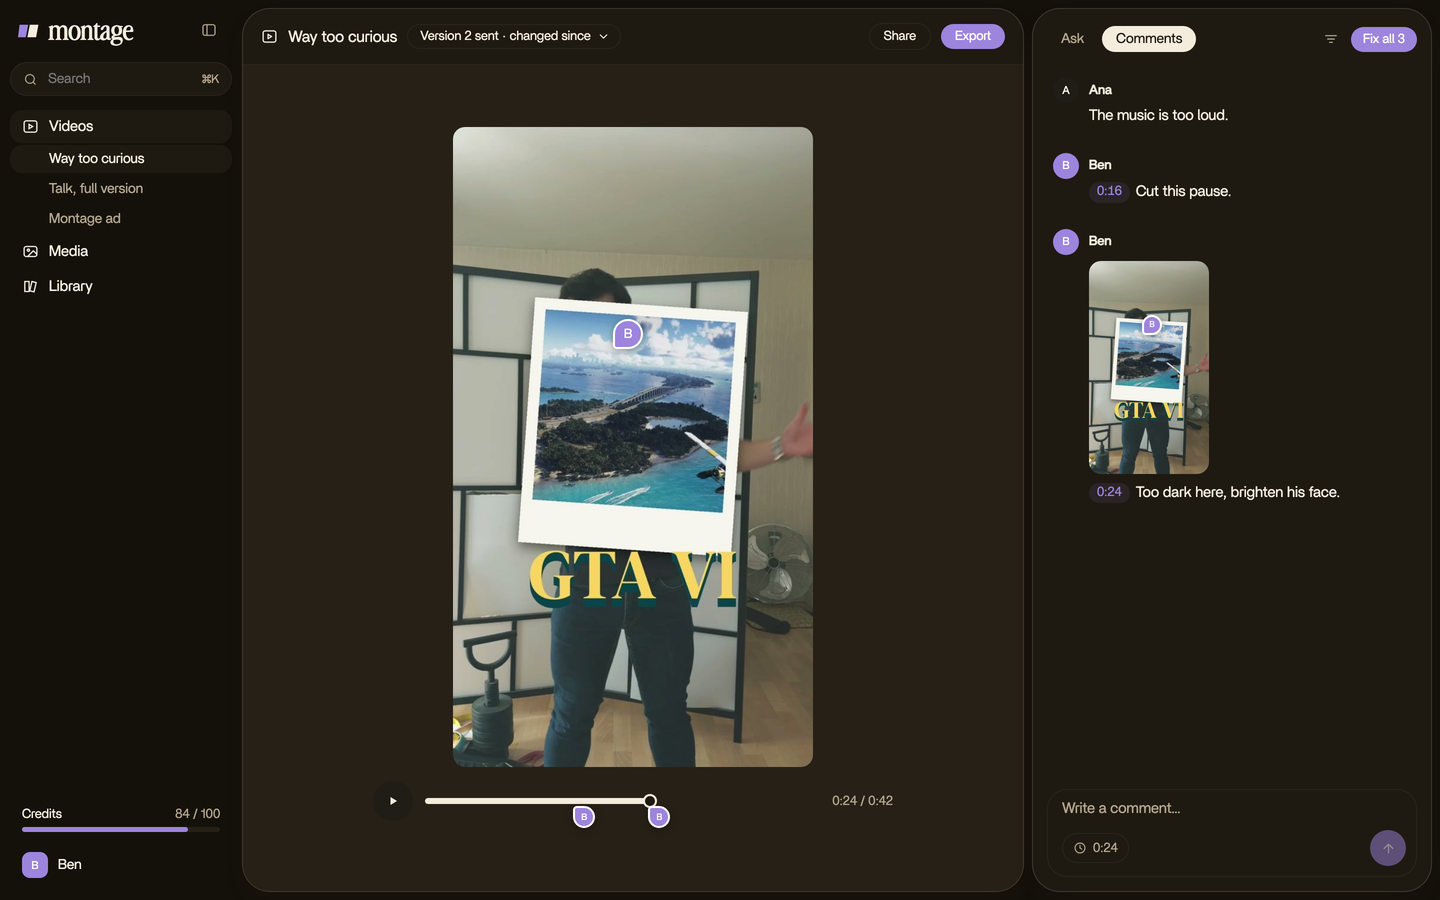
That's color grading done by asking. It's one way of grading with AI, and the result is the split frame you saw at the top.
Sure. But what if you want to finish the grade yourself, in a color grading program? You can export the cut to Premiere Pro or DaVinci Resolve and keep going there.
New to all of this? Start with video editing for beginners: color is one of the five things every edit does.
Apple Log LUT: your questions.
Where can I find a free Apple Log LUT?
Apple publishes its own on its developer downloads page (search « Apple Log profile », free sign-in). Lumadune has a free
one for Apple Log and Apple Log 2, Cinecolor a free one for Apple Log 2. And in DaVinci Resolve 18.6 or later, you don't
need a file: the Color Space Transform takes Apple Log as an input.
What's the best LUT for iPhone Log footage?
To be honest, there's no single best one, and I haven't tested them side by side. My advice: start with a conversion
LUT to Rec.709, adjust exposure and white balance, then add a look LUT if you want a style.
How do I turn on an Apple Log LUT?
Two places. While filming, in the Blackmagic Camera app, as a preview on screen (or burned in). After filming, in your
editor: the Input LUT in Premiere Pro, a node or a Color Space Transform in Resolve.
Where do I get an Apple Log 2 to Rec.709 LUT?
Use one made for Apple Log 2: an Apple Log LUT won't match. Lumadune and Cinecolor have free ones. More in the
Apple Log 2 guide.
Why does my footage look too contrasty after the LUT?
It was converted twice. Maybe a LUT on top of Final Cut's automatic camera LUT, or a LUT and a Color Space Transform.
Keep one method, remove the other.
See it in real videos.
Every grade in this article is in a real video. The four videos show what went in and what came out.
 9:18
 2:07
 0:56
 0:38
That's it for this one. Go film something in Log.
See you in the next one.