How to produce a YouTube video:
from idea to upload.
Five stages, from the idea to the upload. Let me show you what each one hands the next, with one real 9-minute film taken apart.
 Ben, founder of Montage · · 9 min read
In this post10 parts
- The short answer
- How to produce a YouTube video in five stages
- 1. Start with one idea
- 2. Plan the script, and what it names
- 3. Film it on your phone
- 4. The edit: where most first videos stall
- 5. Upload it to YouTube
- The second video is faster
- Questions about how to produce a YouTube video
- Watch the film, start to finish
The short answer.
Ladies and gentlemen, let's start with the answer.
How to produce a YouTube video comes down to five stages. The idea. The plan and the script. Filming. The edit. The upload. That's it. Whether you make it on your phone or on a PC, for free or not, every YouTube video goes through those five.
Here's the thing most guides don't tell you: the stages aren't separate. Each one hands something to the next. What your script names is what the edit has to show. What you film is what the edit has to fix. So you don't produce a video stage by stage. You produce it backwards, knowing what each stage will need.
And the stage where most first videos stall? The edit. That's the one I'll spend the most time on, because today it doesn't have to be the wall. If you want an editor to do it for you, there's an AI editor for YouTube videos that works from a conversation.
How to produce a YouTube video in five stages.
Okay. Let's put the five stages side by side. The example column is a real film of mine, From Disney star to space CEO: 9 minutes and 18 seconds, 16:9, from seven takes and 33 minutes filmed on an iPhone.
| Stage | What you do | What it hands the next stage | In the real film |
|---|---|---|---|
| 1. The idea | Pick one story, for one kind of viewer | A topic you can say in one sentence | A founder's story, from Disney star to space CEO |
| 2. The plan and the script | Write what you'll say, and what will be seen | The list of things the edit will show | Good Luck Charlie, Ready or Not, Billboard, the TODAY antenna; a guest; a sponsor |
| 3. Filming | Record the takes, on your phone | The raw footage, good or flawed | Seven takes, 33 minutes; takes 4 to 7 filmed flat |
| 4. The edit | Cut, color, B-roll, text, sound | One finished video file | 216 cuts, a LUT on the flat takes, a face cam, a sponsor card |
| 5. The upload | Title, description, thumbnail, publish | The video on your channel | The 9:18 film, in 16:9 |
So what does that table tell you? Read the last column from top to bottom. Every line of the edit started in a stage before it.
What you film is what the edit has to work with.
1. Start with one idea.
So where do you start? With one video, not a channel plan.
Pick one thing you can say in a sentence. « How a Disney star became a space CEO. » « How I fixed my morning routine. » If you can't say it in a sentence, the script will wander, and so will the viewer.
Then ask yourself one question: who is this for? Not « everyone ». One kind of person. That's who you'll be talking to when you film.
2. Plan the script, and what it names.
Now, the script. Most guides say « write a script » and stop there. Let me explain why it matters more than that.
Everything your script names, the viewer expects to see. You say a show's name, the show should be on screen. You mention a headline, the headline should be there. Those extra shots are called B-roll, and your script is their shopping list.
 B-rollGood Luck Charlie, Ready or Not, Billboard, the TODAY antenna: the face cam moves to the corner while each plays.
 Color correctionTakes 4 to 7 were filmed flat: the NOMAD LUT on each, the first three left as they were. Same frame, split.
In From Disney star to space CEO, the story names Good Luck Charlie, Ready or Not, Billboard and the TODAY antenna. So those are the B-roll: the face cam moves to the corner while each one plays. That's B-roll dropped in where you name it, and it only works because the story named them first.
The plan holds the other people, too. A guest. A sponsor. An intro. Each one becomes something in the edit, so write it down now. (If the intro is the part you're stuck on, here's making the intro.)
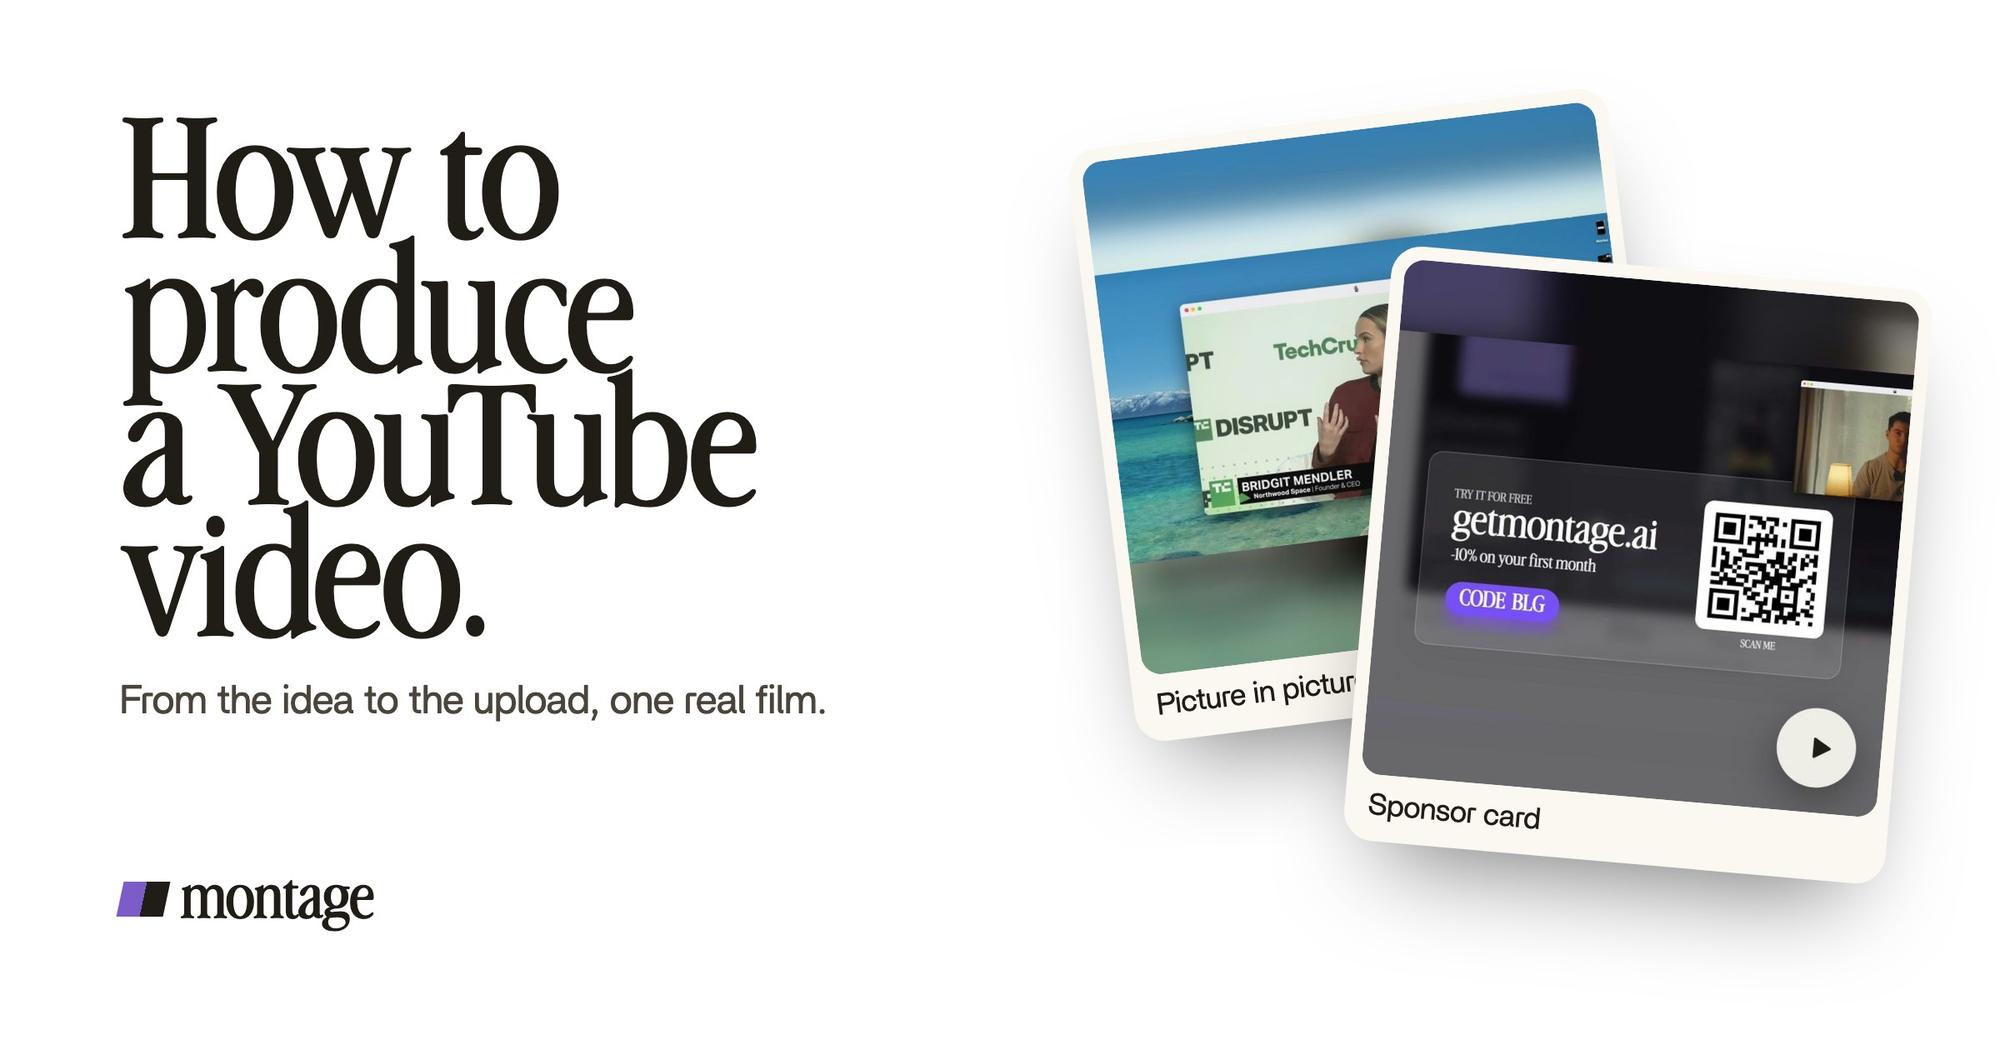
 Picture in pictureThe guest gets a window of her own: Bridgit at TechCrunch Disrupt, over a Mac desktop, while I keep talking.
 Sponsor cardA component made for the sponsor: frosted glass, the QR code and the code BLG. Click to watch it.
The guest, Bridgit at TechCrunch Disrupt, gets a window of her own over a Mac desktop while I keep talking. The sponsor gets a card: frosted glass, the QR code and the code BLG. Each one became a piece of the edit, so each one belongs in the plan.
A guest in the plan is a window in the edit. A sponsor is a card.
3. Film it on your phone.
Do you need a camera? No. Every take of the film above was shot on an iPhone.
A few things to get right, from TechSmith's own phone checklist: film in landscape for YouTube, clean the lens, turn on Do Not Disturb, do a 10-second mic test, look at the lens, and « record your script in small sections ». I'd add one thing: say each line more than once. You can't keep the best take if there's only one. More on recording yourself for YouTube.
And here's what filming hands the edit, good and bad. In my film, takes 4 to 7 were filmed flat; the first three weren't. So the edit put the NOMAD LUT on those four takes only, and left the first three as they were. That's grading the flat takes, and it's a stage-3 decision showing up in stage 4.
The edit can fix a lot. It can only fix what you filmed.
4. The edit: where most first videos stall.
Let's be clear: planning and filming take a phone and an afternoon. The edit is where a lot of first videos stop. Seven takes, 33 minutes of footage: where do you even begin?
This article is about the whole run, so I'll keep the edit to the essentials. For the edit in depth, read how to edit a YouTube video, step by step.
Here's how it works in Montage. You don't learn a program first. You say what you want, then you comment on what's wrong.
- Drop the takes in, as they are. Every take, unsorted.
- Say what you want. What the video is, the B-roll your script named, the guest, the sponsor.
- Watch it through once. Notice where you'd click away.
- Comment on the video. At a moment, or on a spot of the picture: « cut this pause », « this take is too flat ». Then « Fix all ».
- Export. The MP4 you'll upload.
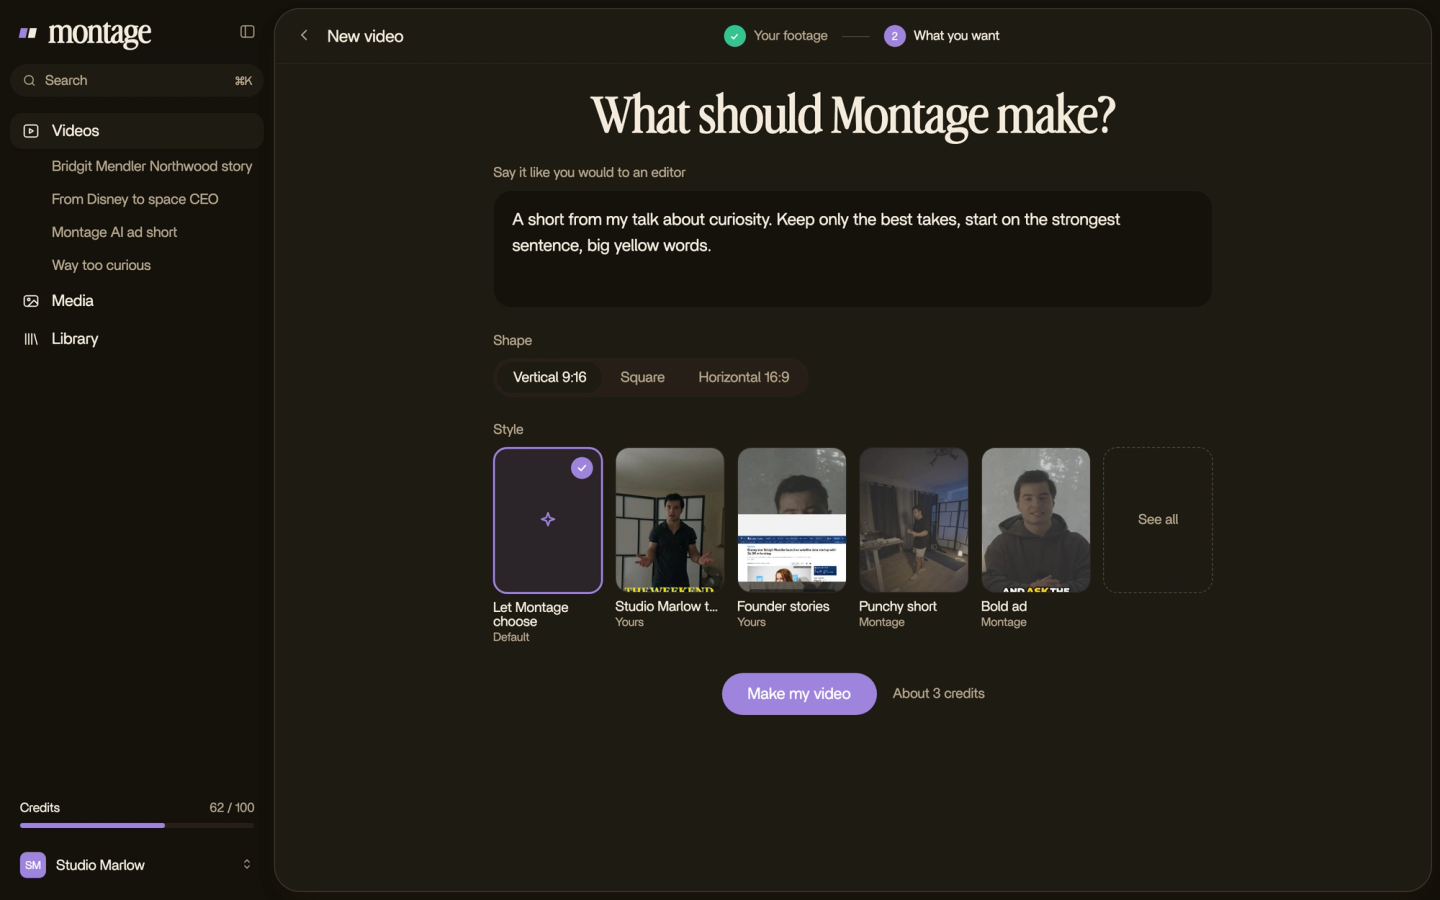
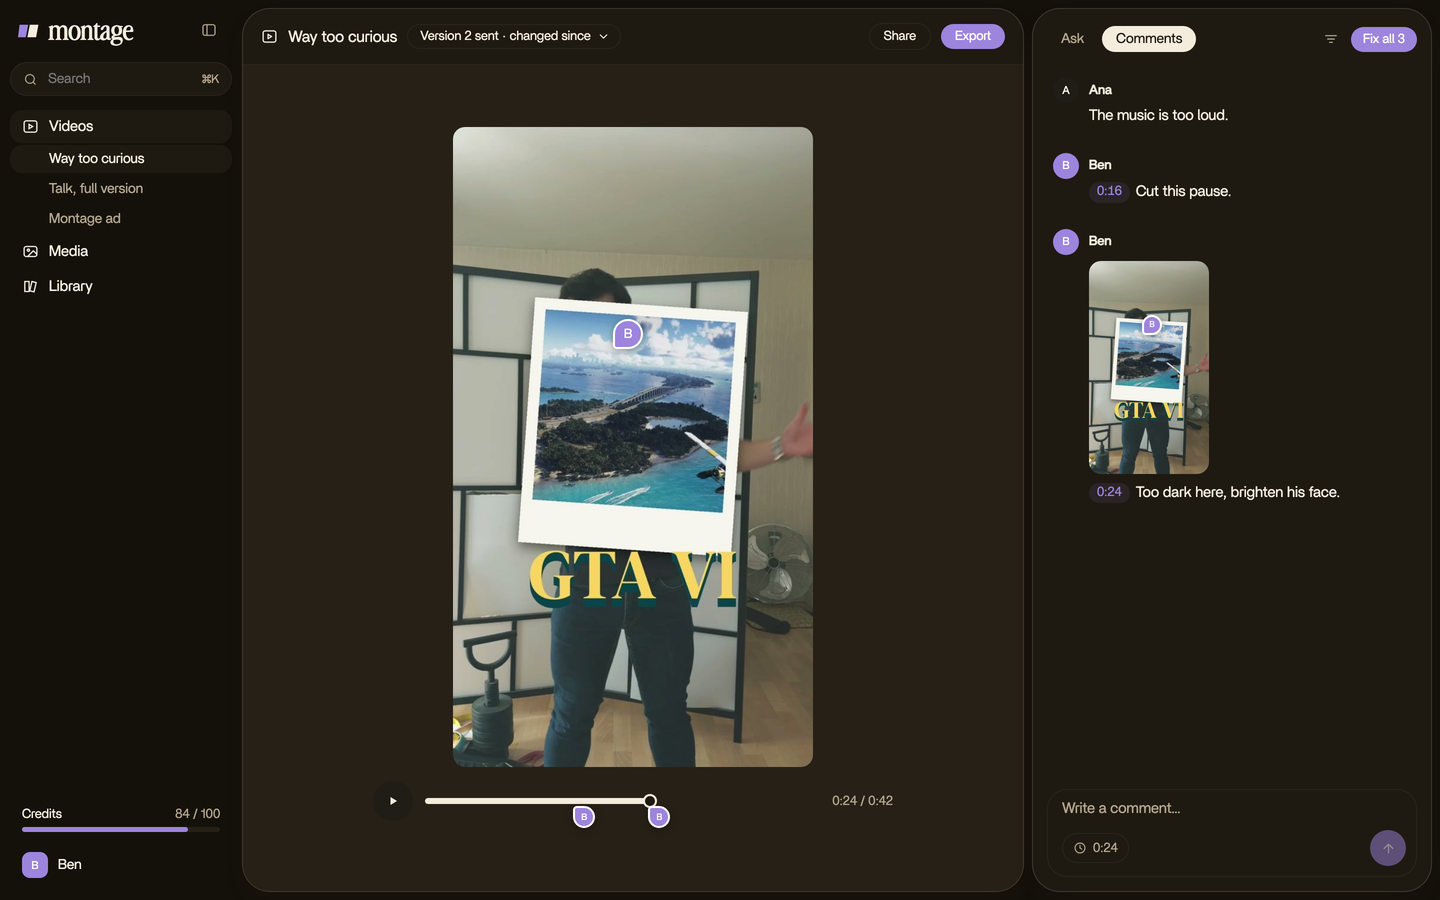
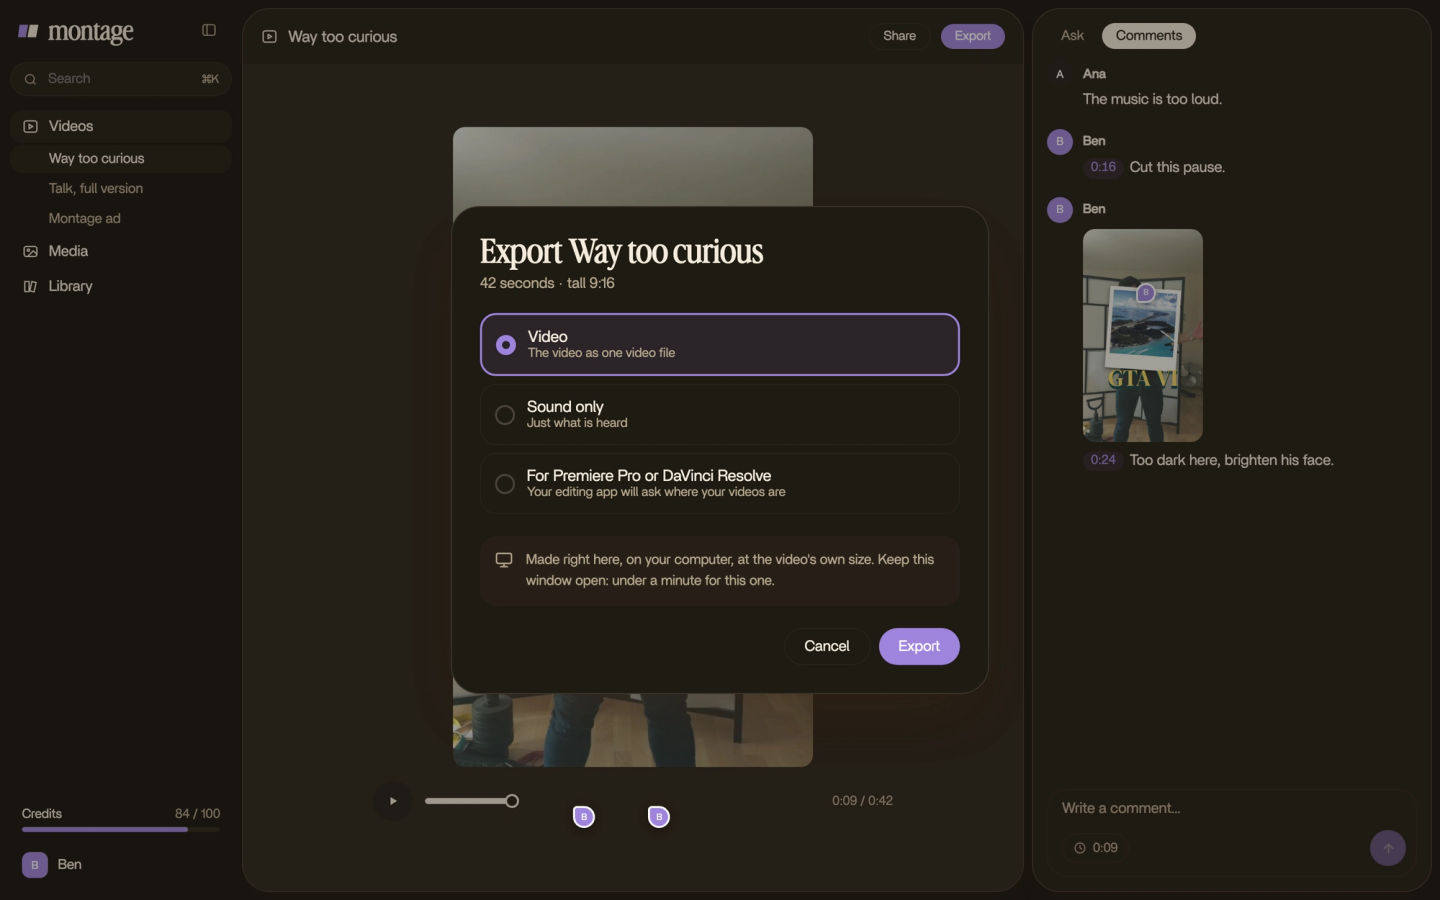
In my film, Montage turned seven takes into 216 cuts and a 9:18 film. And if you'd rather finish it in a timeline editor, the export gives you the cut for Premiere Pro or DaVinci Resolve too.
Sure. But what if you have an editor already? Then you don't need this part. Hand them the takes and the script, and the table above tells them what goes where. Thinking of hiring an editor instead? That's its own question. So is what YouTubers edit with, and editing software for YouTube, compared.
5. Upload it to YouTube.
Now the last stage. This one happens in YouTube Studio, not in your editor. Montage doesn't publish to YouTube: you upload the file yourself.
What you'll fill in:
- The title. Up to 100 characters, according to YouTube's help page on titles and descriptions.
- The description. Up to 5,000 characters, same page. Put what the video is about in the first lines.
- The thumbnail. The picture people see before they decide to click.
And the limits, from YouTube's own upload help page: a file can be up to 256 GB or 12 hours long, whichever is less. But until your account is verified, videos are capped at 15 minutes. Verify first if your film runs longer.
Posted it and spotted a mistake? Some things can still change after it's live. Here's fixing it after it's posted.
The second video is faster.
Here's what most guides skip about producing your first YouTube video: a lot of what you make, you only make once.
 ComponentsMy face cam is a component: a macOS window over the James Webb images, on every one of the 216 cuts. Click to watch it.
 Reusable componentsOne media card, used 26 times: a picture or a clip, its caption, on the dark page. Click to watch it.
My face cam is a component: a macOS window over the James Webb images, on every one of the 216 cuts. One media card, a picture or a clip with its caption, used 26 times. That's a face cam made once, reused, and the next video starts with it already there.
So the second time through the five stages, the edit has less to build. Pretty simple, right? Then it's about keeping people watching: editing for retention and these tips for editing YouTube videos.
Questions about how to produce a YouTube video.
How do I produce a YouTube video?
In five stages. Pick one idea, write a script that names what will be seen, film it in several takes, edit it, then
upload it in YouTube Studio with a title, a description and a thumbnail.
How do I create a video for YouTube?
The same way, on a phone or a PC. Film in landscape for YouTube's 16:9, say each line more than once, and export an MP4
to upload. The edit is the stage that takes the most work.
Is making a YouTube video free?
Uploading to YouTube is free. You can film on the phone you already have. The editor is the part that may cost
something, depending on which one you pick.
How many views does a YouTube video need to make $1,000?
There's no flat rate per 1,000 views: it depends on the viewers, the topic and the ads. And before any ad money, you
need the YouTube Partner Program: 1,000 subscribers with 4,000 public watch hours in 12 months, or 10 million Shorts
views in 90 days, according to YouTube's help page on the program.
How many views do I need to make $10,000 a month on YouTube?
Same answer: no fixed number, because the pay per view isn't fixed. Get into the Partner Program first, then keep
producing. Sponsors pay too, which is why a sponsor belongs in the plan.
Watch the film, start to finish.
Everything in this guide comes from one real YouTube video. Watch the 9:18 film and look for each stage in it: the B-roll the script named, the flat takes graded, the guest's window, the sponsor's card.
 9:18
 2:07
 0:56
 0:38
That's it for this one. Now go pick your idea.
See you in the next one.